

I love simple paper plate projects and I’ve gathered 25 ideas you can do with kids using plates, paints, yarn, googly eyes, and a few household scraps. Start with animal faces, masks, and puppet sticks for role-play; make spinning rainbow wheels or color-learning clocks with a brad; try suns, ladybugs, turtles, moving fish with pull-tabs, and jellyfish with yarn tentacles. I’ll share step-by-step tips for materials, safety, and clever variations so you can try more.
Key Takeaways
- Offer a variety of themes (animals, ocean, seasons, STEAM, masks) to match kids’ interests and skill levels.
- Use simple materials (paper plates, paint, markers, glue, googly eyes, yarn) for easy setup and cleanup.
- Provide step-up options: toddler-safe pre-cut shapes and older-kid design challenges or movable parts.
- Include learning goals: color/number/fraction practice, emotion recognition, sensory textures, and fine-motor skills.
- Add display and play ideas: hang mobiles, mount as puppets, create role-play masks, or assemble classroom galleries.
Paper Plate Animal Faces
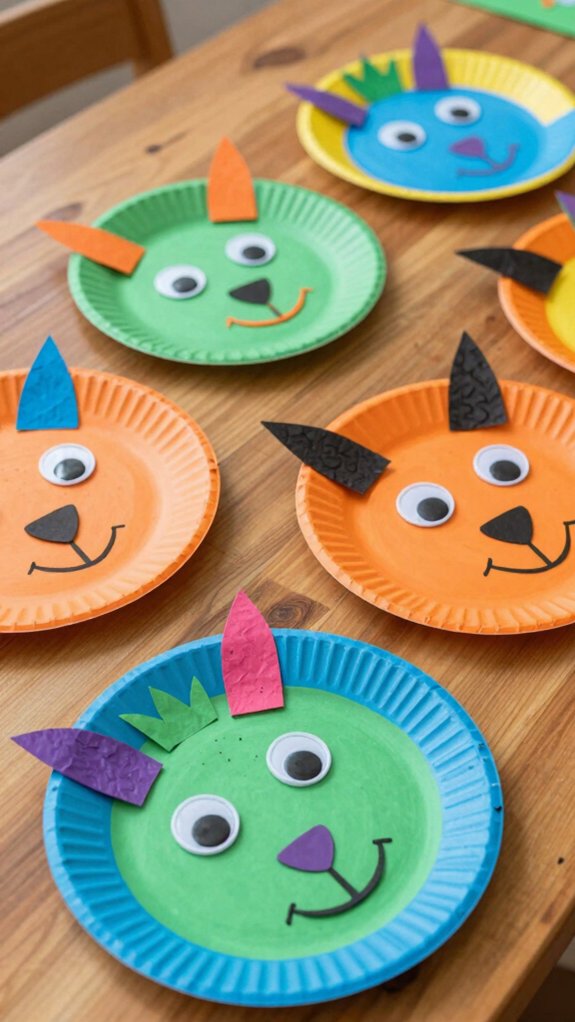
Paper plate animal faces are a quick, hands-on way to spark creativity and build skills, and I’ll show you how to make them feel both simple and special.
I like using one dinner-sized plate, paint or markers, and glued-on cardstock or pom-poms to craft expressive eyes, noses, and ears.
Simple slits for a lion’s mane or folded cuts for beaks teach fine motor work; adults handle intricate cutting.
Add googly eyes, yarn manes, cupcake-liner feathers, or layered cardstock to boost sensory vocabulary—fluffy, smooth, bumpy—and invite kids to investigate animal emotions through facial shapes.
Toddlers stick pre-cut shapes, older kids design scenes and movable parts.
I’ll guide you step by step so everyone feels included and proud.
Rainbow Wheel Craft
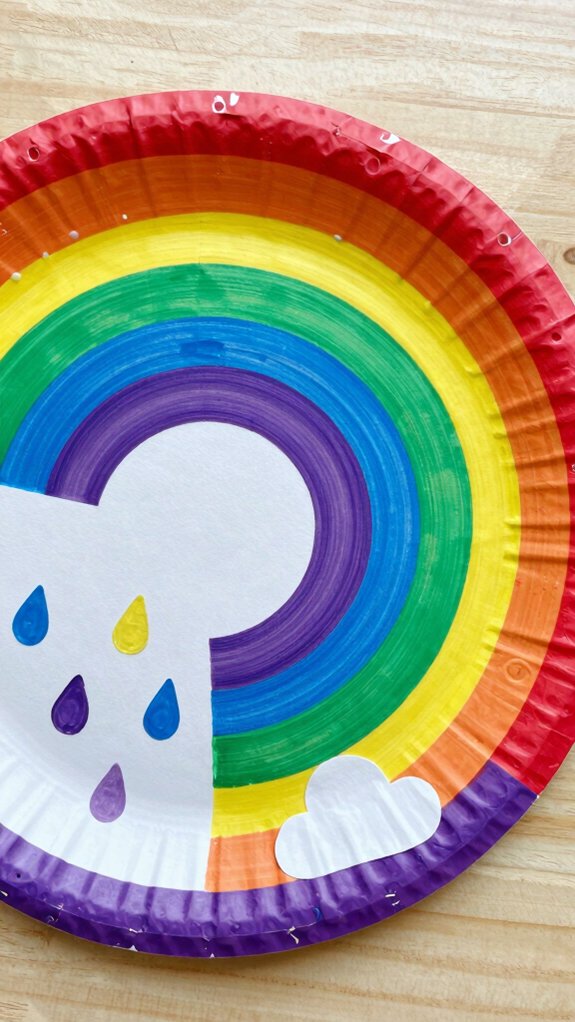
I love using the Rainbow Wheel as a hands-on color learning activity because it turns the seven rainbow hues into a playful lesson in order and mixing.
Start by dividing a paper plate into red through violet wedges—paint or glue pre-cut colored paper for a neater classroom option—and attach the center with a brad so kids can spin to observe how adjacent colors blend when moving.
This craft sharpens color recognition and sequencing while building fine motor skills, and you can boost durability with lamination or add glitter and stickers for extra motivation.
Color learning activity
Usually I start simple and hands-on: grab a plain paper plate and turn it into a bright rainbow wheel that teaches color names, order, and a few other skills at once.
I divide the plate into six wedges, paint red, orange, yellow, green, blue, and purple, then label each wedge with the color word or a number for extra practice.
For texture association, I add felt, sandpaper, or cotton patches so kids link feel with color—this multisensory step boosts memory and involvement.
Removable swatches on cardstock or Velcro let children match colors to objects, sort, and practice vocabulary enrichment.
Finally, I attach a cardboard arrow with a paper fastener so they spin, name the color, and take turns.
Paper Plate Sun
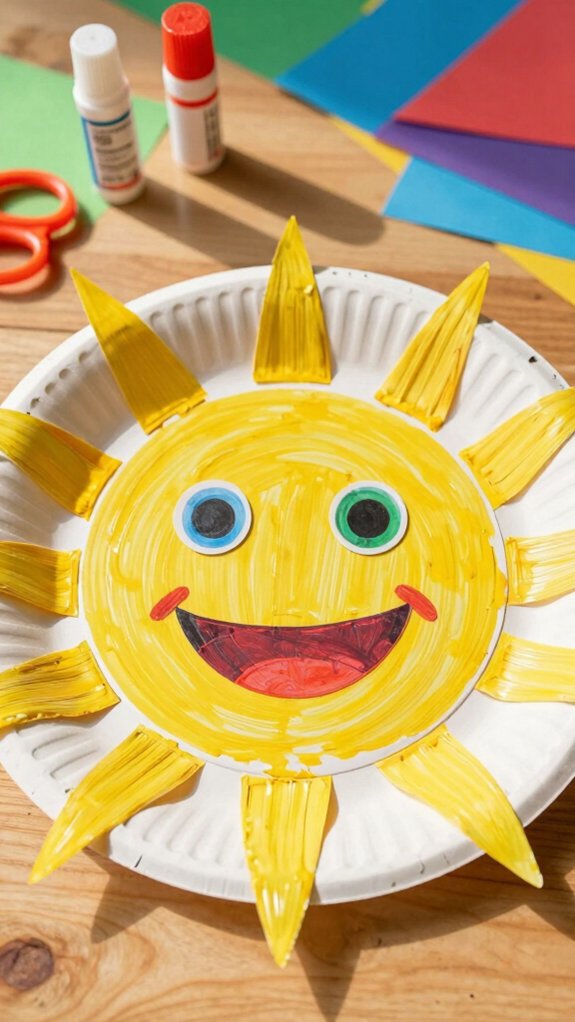
Let’s brighten up the room with a cheerful sun craft you can make in about 30–45 minutes; I’ll walk you through using a dinner‑sized paper plate as the sunny base and adding rays, a face, and simple display options. First, paint the plate bright yellow and let acrylic or tempera dry fully (about 20–30 minutes). While it dries, cut long triangular rays from extra plates or construction paper and plan spacing about 1–2 inches. Glue the rays around the edge for a 3D effect. Add two 1–2 inch googly eyes and draw a smiling mouth, or dab pink paint for rosy cheeks. For fine motor practice, punch holes around the rim and lace yarn every other hole. Display by stapling a ribbon loop, mounting on cardstock for seasonal symbolism, or attaching a popsicle stick; I also remind kids about sun safety when we talk about suns.
Moving Fish Craft
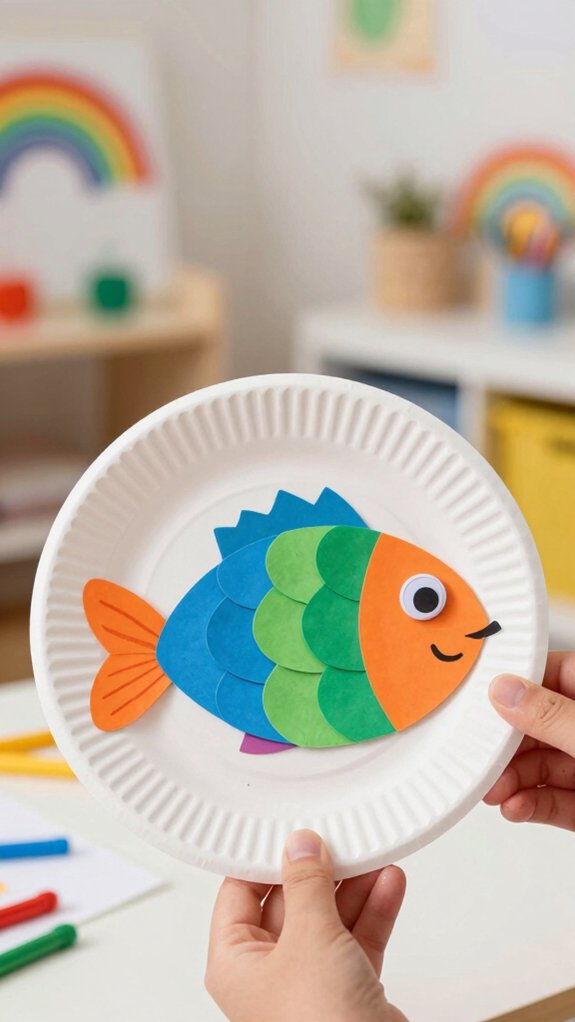
I love using a split plate design for the moving fish because cutting the plate into two semicircles lets you attach the tail on one half with a brad and keep the body on the other for a neat pivot.
You can slip a folded paper strip through a small slit and glue it to the tail so pulling the strip makes the tail swing, and I find that reinforcing the slit with a dab of glue prevents tearing during play.
For texture and color, glue cupcake liners or layered paper around the open edge before you assemble, since that gives a 3D look while keeping the moving parts free to swim.
Split plate design
Grab a paper plate and a pair of scissors, and you’ve already got the start of a clever moving fish—one that seems to wiggle or change expressions just by rotating or sliding its center. I love this split plate design because it teaches kinetic storytelling and mechanical exploration while feeling totally inclusive; we’ll build it together step by step.
Cut the plate into an outer rim and an inner disc, then choose rotation or sliding for motion. Tips I use:
- Use a brad through both centers or mount the disc on a straw axle for smooth spinning.
- Decorate the inner disc as the fish’s body; attach fins and eyes to the rim.
- For sliding, add a cardboard track and a tab on the disc.
- Try tissue paper for scales and compare motion effects.
This takes 15–30 minutes and sharpens fine motor skills.
Ladybug Plate Art
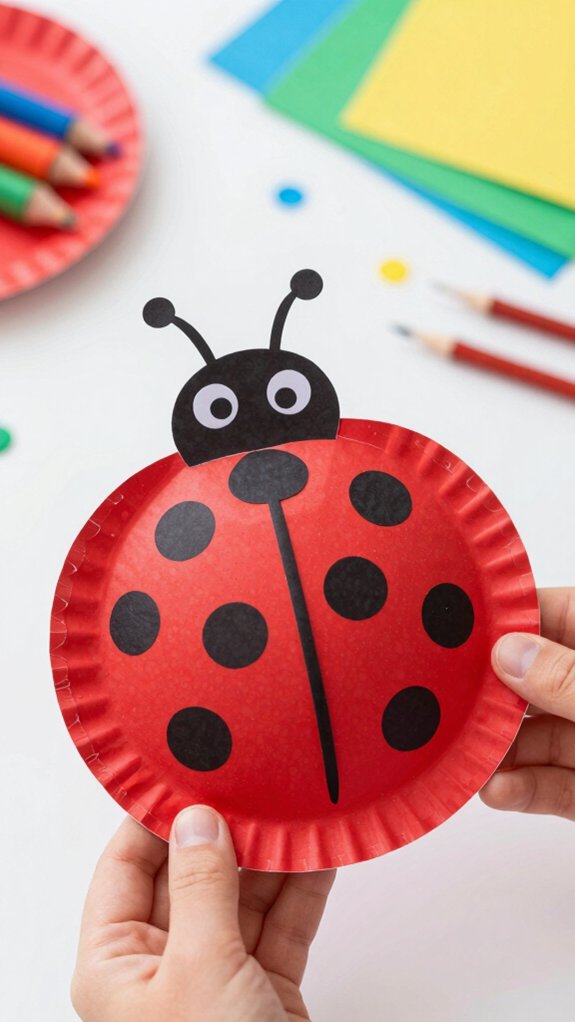
Start by painting a paper plate bright red and let it dry while you gather the rest of your supplies—black paint, a smaller plate or lid to trace a center line, pom-poms, pipe cleaners, and googly eyes—because a neat base makes the whole ladybug pop.
I like to trace a straight center line for the wings, then add evenly spaced black spots to teach spot symmetry; three to seven spots work well.
For antenna textures, punch two small holes at the rim and thread pipe cleaners with pom-pom ends, which adds dimension and tactile fun.
Glue a black semicircle head at the top and attach 1/2–1″ googly eyes for a friendly face.
Optional: punch holes for yarn to hang or cut eye holes to make a mask.
Paper Plate Dinosaur
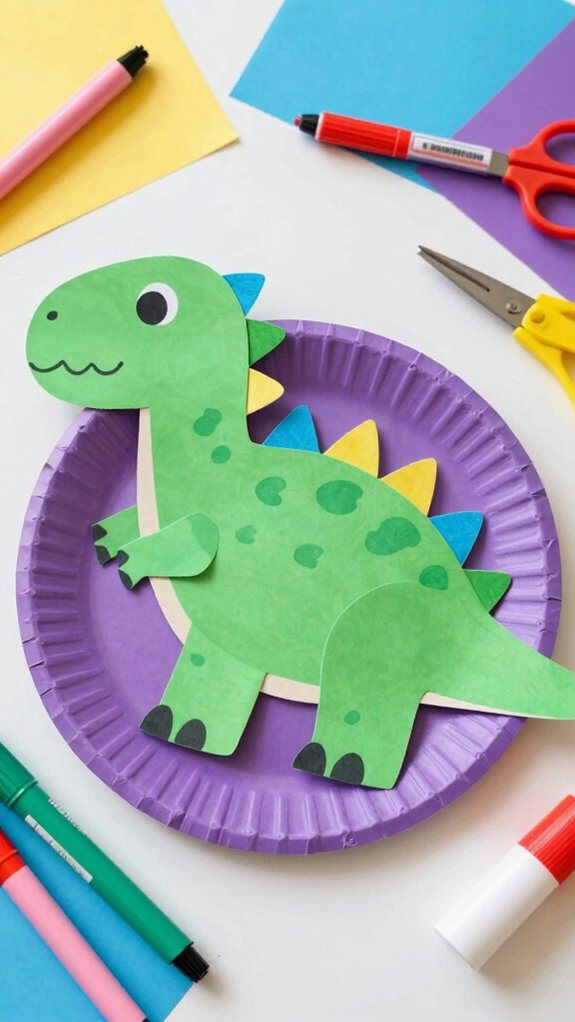
Make a dinosaur out of a paper plate by cutting the plate into a body, head, tail, and legs—or for an easier route, trace and cut a single large dinosaur silhouette from one plate and decorate it. I love guiding kids through this because it’s simple, inclusive, and sparks confidence as we build dinosaur habitats on cardstock.
Use paint, markers, glued construction paper scales, and googly eyes to give personality.
- Materials: paper plates, child-safe scissors, washable paint, construction paper, glue.
- Types: stegosaurus with glued plate “plates,” brontosaurus with a long neck strip, or a toothy T‑Rex.
- Creative textures: bubble wrap stamps, layered spikes, sequins.
- Skill gains: fine motor practice, planning, and imaginative play.
Hot Air Balloon Craft
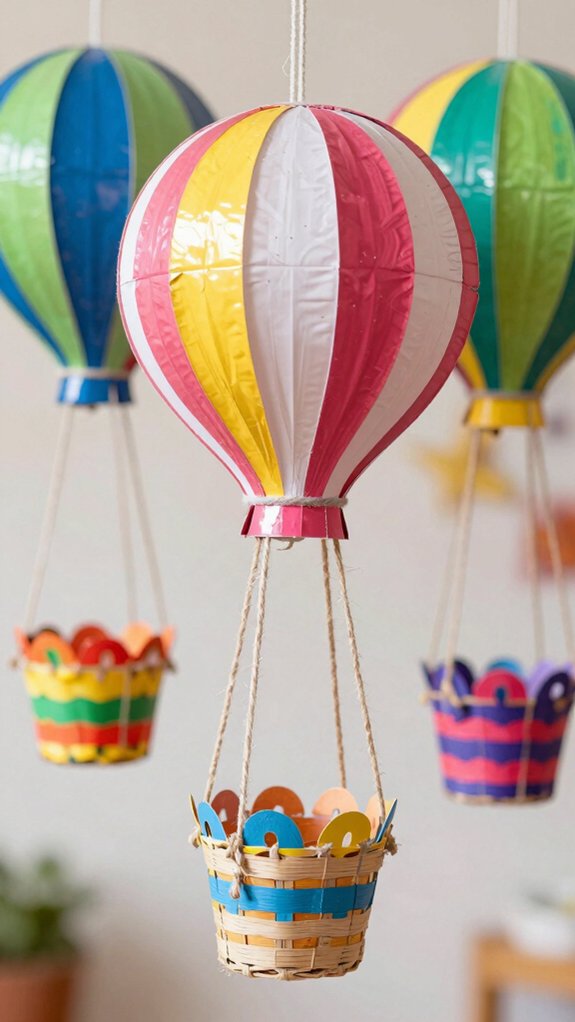
I love showing kids how a simple string basket can make a paper plate hot air balloon feel more real, so I usually start by measuring three equal-length pieces of yarn and tying them to the rim at even intervals.
Then I attach those strings to the folded paper basket, checking that they pull straight so the gondola hangs level — if one side tilts, I shorten that string a bit or move its attachment point.
For a cleaner finish, I knot and tape the ends inside the basket and hide the knots with a strip of construction paper or a pom-pom, which also gives the craft a neat, colorful accent.
String basket detail
Picture the little basket that hangs beneath your paper plate “balloon” as the craft’s anchor — I’ll walk you through making it sturdy, balanced, and cute.
I use a 4–6 inch strip or a small half plate and fold it into a rectangle or cylinder, then reinforce with a second layer or washi tape.
I attach four equal strings about 8–12 inches long, spacing them to form a square footprint so the plate sits level.
- Cut the strip to match a 9-inch plate proportionally.
- Reinforce seams with glue or tape for extra strength.
- Attach strings by knotting through holes or hot-gluing for security.
- Decorate and line with cardstock if you expect heavier embellishments.
I always do balance testing and mention material alternatives to fit our shared crafting vibe.
Under the Sea Scene
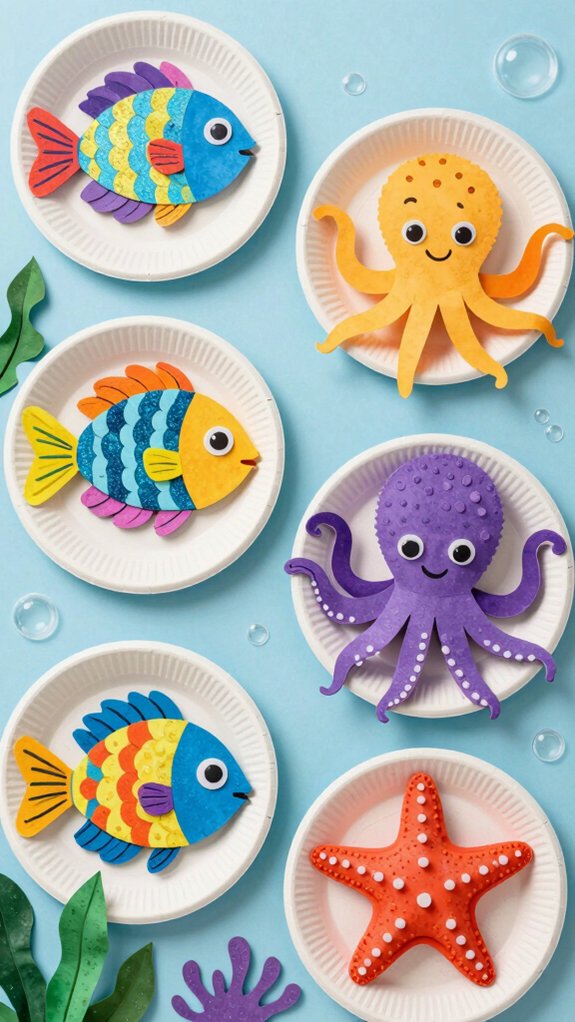
When I plunge into an “Under the Sea” paper plate project, I like to start by imagining a tiny aquarium where every piece adds color and texture—so I’ll often paint a plate blue, glue a strip of sand-colored paper along the bottom, and plan where to place paper fish, sequins, and cereal “bubbles” for a pop of 3-D detail.
I invite you to join in ocean storytelling by choosing a focal creature—whale, jellyfish, or puffer fish—and build tidepool textures with torn tissue paper, cupcake liner fish, and glued-on shapes.
For movement, make a spinning jellyfish with yarn tentacles; for playful height, fold two plates into a spouting whale using a straw spout.
Small, shared tips keep us crafting together and confident.
Paper Plate Mask
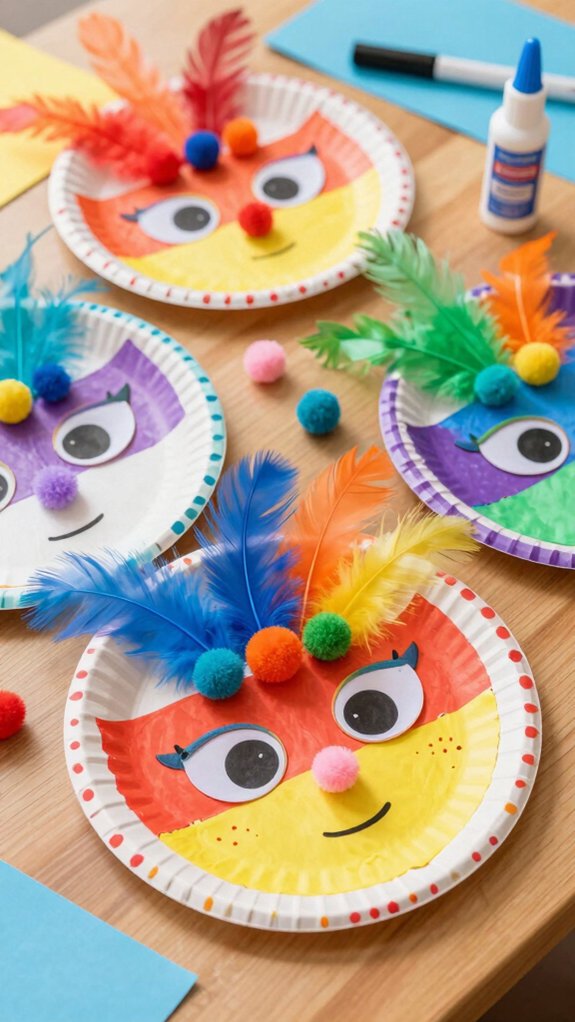
Start by choosing your mask style—full-face, half-mask, or a fun animal snout—then grab a dinner-sized paper plate and a pencil so you can sketch where the eyes and any mouth or nose will go.
I like trimming the rim for half-masks and cutting a small center for full faces, then reinforcing edges with tape for durability. Adults should handle craft knives for young kids; punch side holes for elastic or attach a popsicle stick.
- Paint or markers for base color
- Googly eyes, feathers, yarn hair, and paper shapes
- Pre-cut eye holes for groups or parties
- Safe adhesives, washable paints, and stickers
We use masks for character backstory building and emotion practice during role-play, which helps everyone connect.
Turtle Craft with Tissue Paper
I love using this turtle craft to build texture practice, because crumpling and layering tissue pieces gives kids a hands-on way to feel and see different surfaces.
Start by painting or covering a dinner-size paper plate with mixed green tissue squares, then press overlapping crumpled bits with a glue stick or watered-down white glue so the shell ends up bumpy like real scutes.
For younger kids I pre-cut the head, legs, and tail, while older kids can practice scissors and glue control—finish with marker details or googly eyes once the tissue is dry.
Texture practice
Crumpling small squares of tissue paper into little “scales” turns a plain paper plate into a tactile turtle shell, and I’ll show you how to make that texture both eye-catching and developmentally useful.
I like to offer a palette of colors and encourage layering—overlap pieces about 20–30%—so the shell builds depth and looks mosaic-like.
Pre-cutting or pre-scrunching 20–30 squares helps preschoolers stay involved and gives steady fine motor practice.
- Use a curved plate as a base and glue 1–2 inch crumpled squares for raised texture.
- Press each piece lightly to strengthen pincer grasp and hand control.
- Add pom-pom feet, yarn head, and raised googly eyes for mixed textures.
- Prompt sensory vocabulary and tactile storytelling as you craft together.
Paper Plate Clock
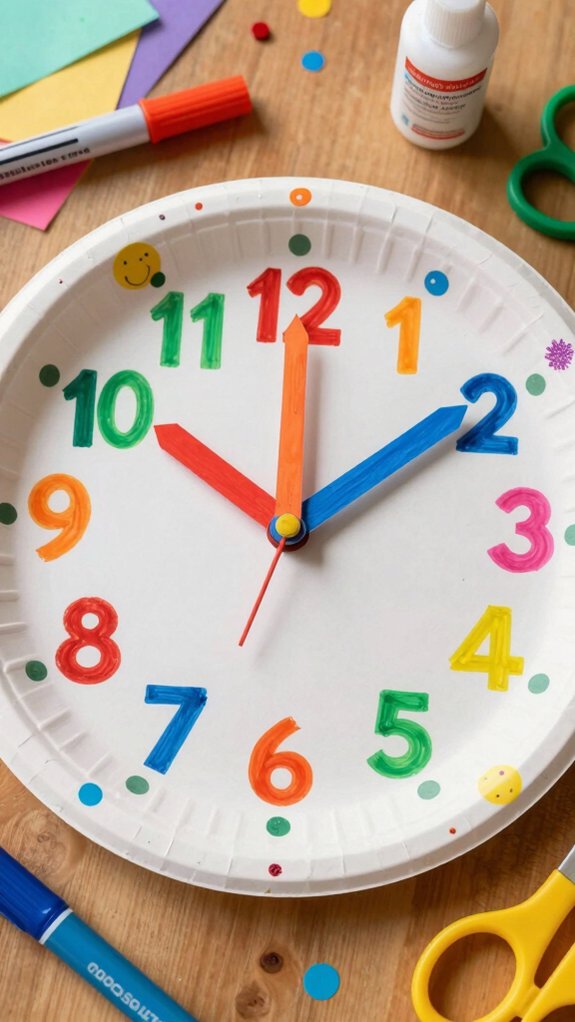
Let’s make a paper plate clock that actually helps kids learn time while they have fun—I’ll walk you through a simple, sturdy version that you can decorate and use for lots of practice. I invite you to join me as we paint a 9-inch plate, add bold numerals 1–12, and mark every fifth minute so kids count by fives. Label the short hour hand and long minute hand, color-code zones, and include clock vocabulary like o’clock, half past, quarter to. We even talk briefly about time zones to spark curiosity. Assemble hands with a brass fastener for rotation and durability. Play reading games and track progress together with this checklist:
| Task | Tip | Goal |
|---|---|---|
| Paint plate | Use bright colors | Involve fine motor |
| Numbering | Bold stickers | Read hours easily |
| Minute marks | Mark every 5 | Count by fives |
| Hands | Cardstock + brad | Rotate smoothly |
| Games | Timed challenges | Master times |
Spinning Color Wheel
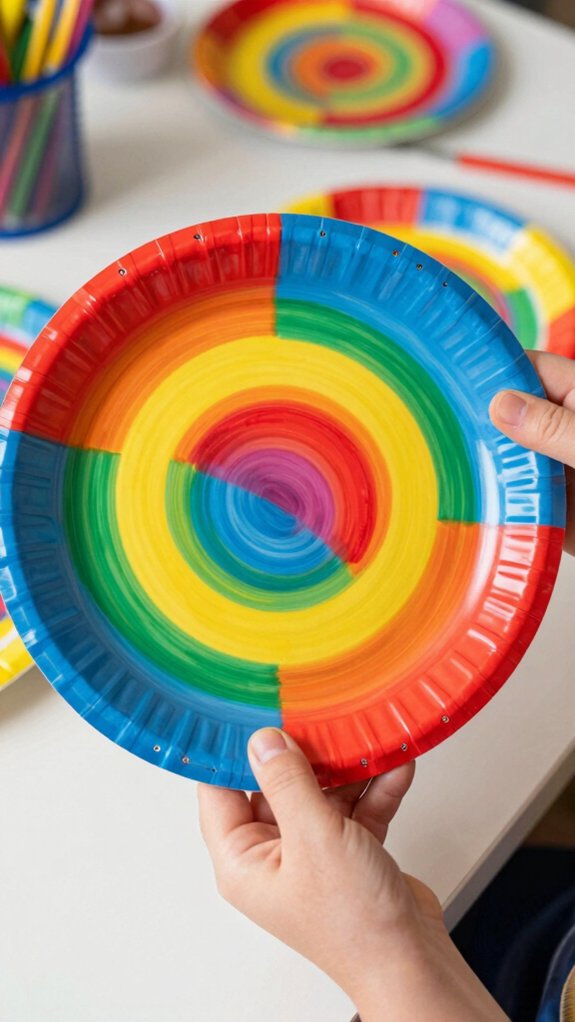
After you finish the clock, try a colorful spinner that teaches about color mixing while you play—the spinning color wheel uses two paper plates so it’s quick to make and really satisfying to watch.
I like to paint the rim of one plate into equal segments, cut the center from the other, stack them arranged, and fix a brass fastener so the top plate spins freely.
It’s a friendly way to investigate color perception and rotational symmetry while we learn.
- Aim for 3–12 segments to compare mixes.
- Flick at 10–20 rps to observe additive blending.
- Add a cardboard handle for easier spinning.
- Try cellophane for different optical effects.
This craft builds skills, teaches fractions, and makes learning together fun.
Paper Plate Dreamcatcher
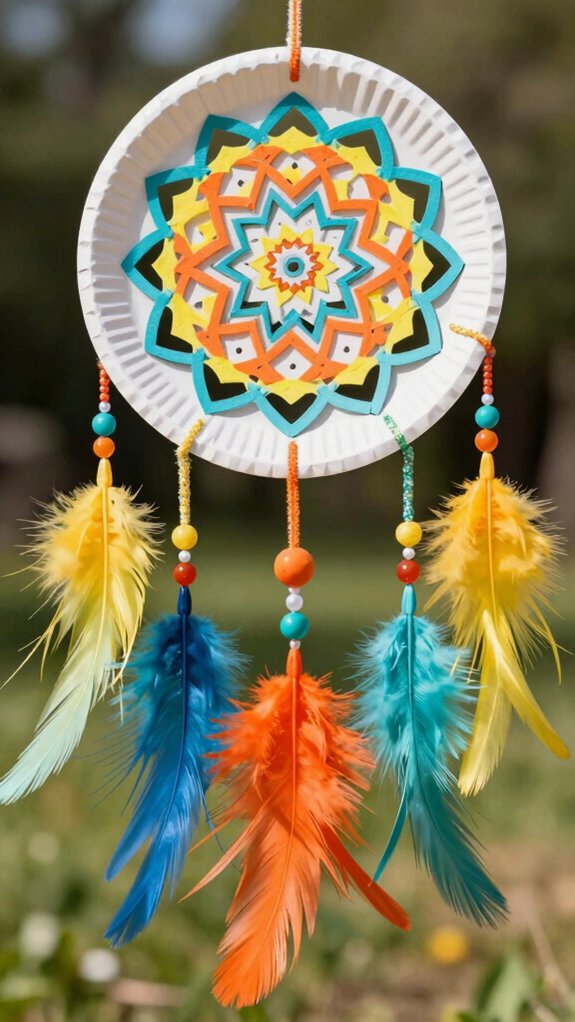
For a simple, colorful twist on a classic craft, I like to turn a paper plate into a dreamcatcher by cutting out the center so the remaining 2–3 inch rim becomes a sturdy hoop for weaving; it’s faster than finding a wooden ring and perfect for kids.
First, gather a materials list: salad or dinner plate (6–10″), yarn, scissors, tape, beads, feathers, paint, cardstock.
Punch 6–12 evenly spaced holes around the rim and weave yarn in a crisscross web, tying at each hole.
Decorate the rim with paint or washi tape, then attach ribbons and feathers to dangle.
I also mention cultural meaning gently, reminding readers to respect origins while enjoying hands-on creativity together.
Seal the back with cardstock for durability.
Farm Animal Faces
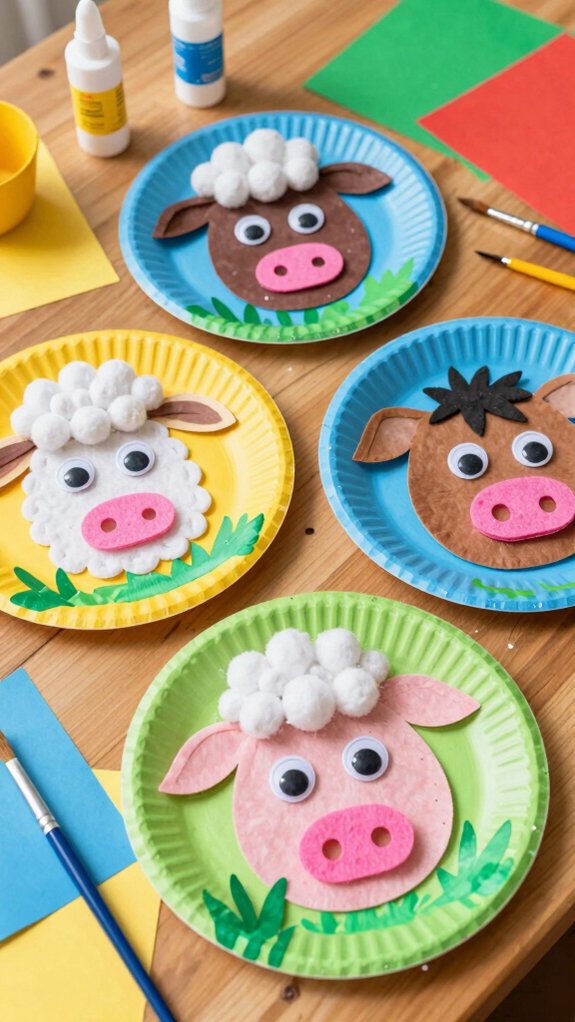
I love turning our paper plate farm animal faces into a barn-themed set, and you can easily group a cow, pig, sheep, chicken, and horse together on a red-construction-paper “barn” background for display.
Start by painting each dinner plate, add simple pre-cut ears or snouts, then arrange them in stalls with labels that say the animal name and sound to reinforce vocabulary and make a classroom-ready scene.
For a quick option, tape the finished faces onto a large paper barn, or punch holes and string them across a “barn door” for a hanging mobile that doubles as masks and art.
Barn theme option
When you pick up a plain 9-inch paper plate and imagine it as a friendly farm face, you’ve already started a project that’s simple, sturdy, and full of learning opportunities—I’ll show you how to make cows, pigs, chicks, and more.
I like turning a cluster of plates into a mini red barn scene, with a hay bale backdrop for extra texture and storytelling. Paint plates, add cardstock ears or snouts (about 3 in), and glue them so they peek over the rim. Use googly eyes or layered cardstock for clear faces and washable markers for noses and whiskers.
- Make ears, beaks, or snouts from cardstock for 3D effect
- Add yarn tufts or pom‑pom noses for fine‑motor practice
- Label animals for learning and role‑play
- Mount on sticks for puppet storytelling
Paper Plate Jellyfish
Because a paper plate jellyfish comes together quickly and looks so cheerful, I’m excited to show you how to make one that’s bright, sturdy, and perfect for hands-on learning.
I paint the underside of a paper plate in bold colors, then add fringe-like tentacles from crepe paper, streamers, or tissue strips; curling them with a pencil gives lively movement and a 3D feel.
For extra durability I glue two plates rim-to-rim for a bowl-shaped body that hides glued ends.
We add googly eyes or pom-poms for a friendly face and vary tentacle lengths to practice counting and scissor skills.
This project ties into ocean habitats and sensory play, and it adjusts well for group color-scheme activities.
Season Tree Craft
I love using a paper plate to make a Season Tree because it gives four clear quadrants to teach spring, summer, fall, and winter side by side. I’ll show how to use paint, tissue, torn paper, and cotton to represent blossoming buds, full green leaves, colorful fall foliage, and snowy bare branches, and I’ll compare a split-plate layout with a rotating wheel so you can pick what fits your time and skill level.
With simple steps and a few material swaps, you’ll have a hands-on way to build seasonal vocabulary, practice cutting and gluing, and finish the project in about 20–40 minutes.
Four seasons learning
While we cut and glue, I’ll show you how a simple paper plate can turn into a four-season tree that’s perfect for hands-on learning and lively conversation. I make a ring from a plate, add a brown paper trunk or rolled tube, and divide it into four quadrants so kids can flip or rotate to talk about seasonal vocabulary and nature changes. This activity takes 20–30 minutes and builds fine motor skills while inviting sharing and questions.
- Spring: pastel tissue blossoms, green paper leaves.
- Summer: bright yellow suns, felt flowers for full foliage.
- Fall: torn red, orange, brown leaves plus real samples.
- Winter: cotton-ball snow, white glitter, bare twigs.
Try guiding sequencing and weather words as you craft together.
Paper Plate Lion Mane
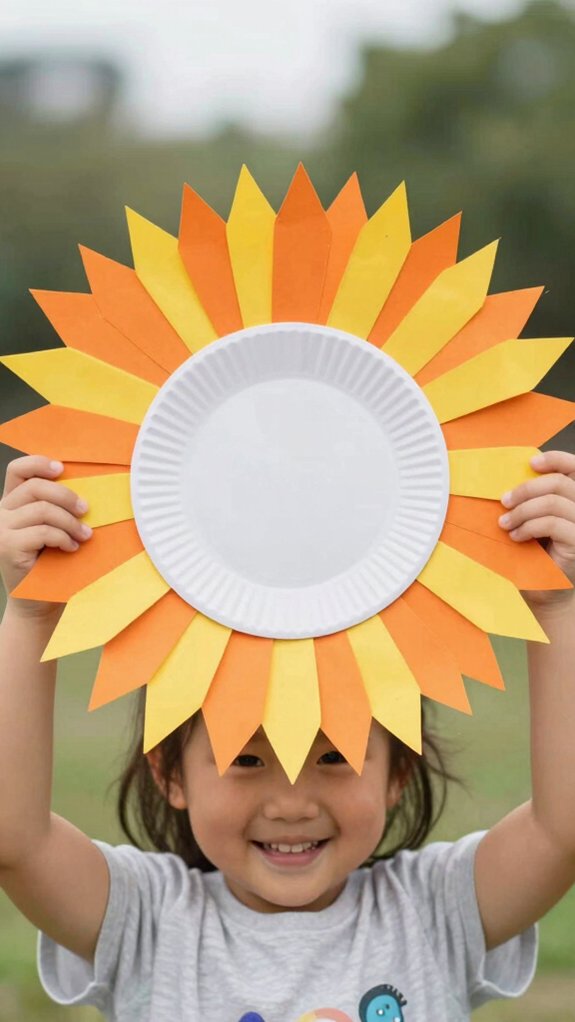
Grab a paper plate and let’s make a bold, textured lion mane that’s as fun to build as it’s to show off.
I’ll guide you step-by-step so everyone feels included: for an older child, cut slits around the rim, paint orange, then curl each slit with a pencil for real mane texture and 3D pop. For younger kids, use an orange plate and glue concentric yellow and red strips—no cutting needed.
Add fine-motor practice by gluing pom-poms, yarn, or fringe tissue, counting pieces as you go.
Attach a 2″ white cardstock oval, add googly eyes and a drawn nose, then glue the mane to peek behind the face. Finish by naming your lion, sharing roar stories, and pretending with a popsicle-stick handle.
Basketball Hoop Mini Game
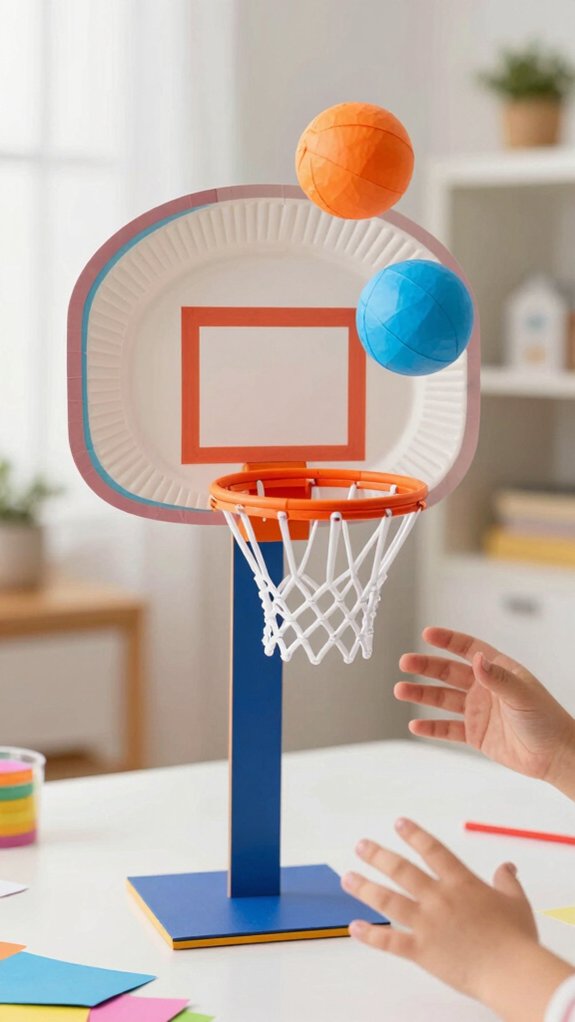
Let’s build a mini basketball hoop that’s perfect for quick games in the hallway or classroom—it’s sturdy, portable, and quick to make. I cut a 4–5 inch hole in one paper plate and glue a second plate underneath for a rim and backboard, folding the edge or layering plates for strength. I attach it with painter’s tape or a stapled string loop about 3–4 feet high for little players, higher for older kids. I make soft paper-ball “basketballs” by scrunching tissue or rolling paper and wrapping with masking tape.
- Set point zones: 1–3 points for distance
- Time rounds: 30 seconds per turn
- Use a paper tally sheet for scorekeeping strategies
- Run a friendly mini tournament for belonging
Paper Plate Flower
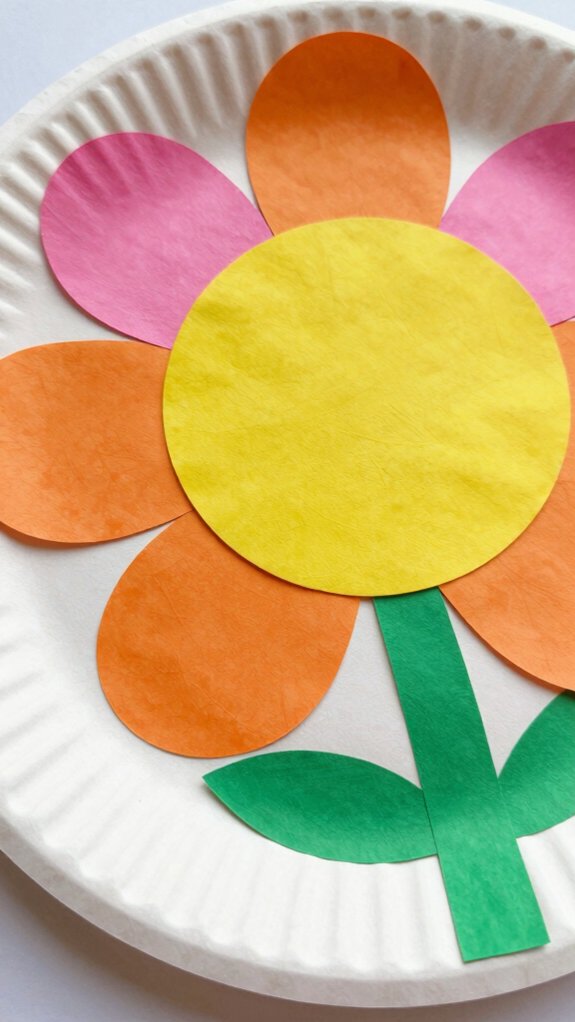
After the fast-paced fun of a hallway basketball mini game, you might want a calm, hands-on craft that still gets everyone smiling—so I’m showing you how to make colorful paper plate flowers that look great on display. I walk you through cutting petals from the rim, painting with tempera for quick drying (20–30 minutes), then adding a 3D center like a pom‑pom or crumpled paper for texture. For stems, attach green paper or a wrapped popsicle stick and reinforce with glue or a staple. Mixed media—markers for veins, gems, layered plates—adds fullness and fine motor practice. This is great for group prep and sensory exploration that invites sharing and color mixing as everyone creates together.
| Petal cut | Painted base | 3D center |
|---|---|---|
| Zig-zag | Tempera wash | Pom‑pom |
| Rounded | Dry 20–30 min | Crumpled paper |
Bee Craft with Wings
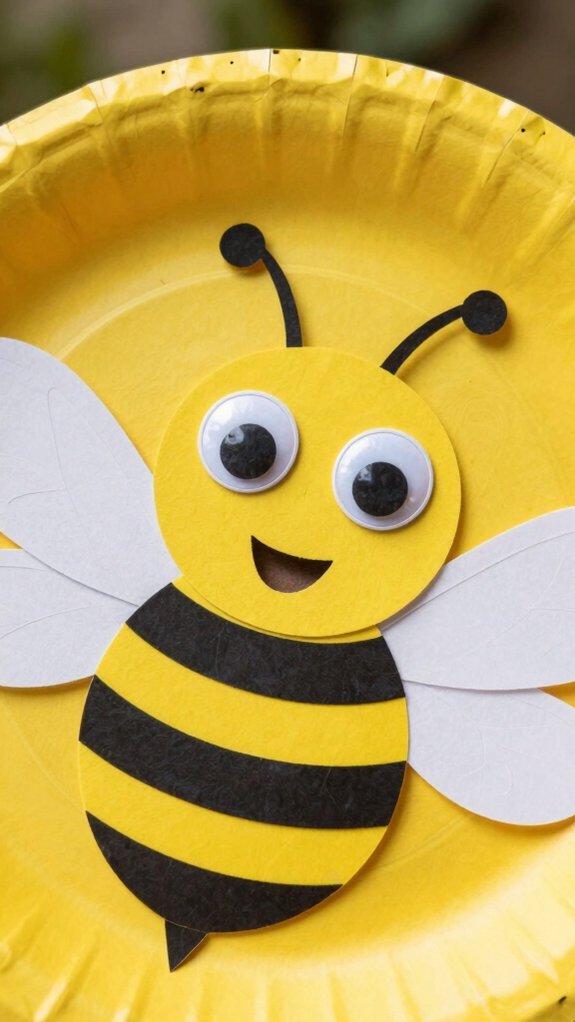
I’ll walk you through cut-and-glue practice using the bee craft with wings, so you can build fine motor skills while making something cute and useful.
Start by cutting two wing shapes from white cardstock or coffee filters and gluing them to the back top edge, then practice neat straight cuts for the black stripes and careful glue placement so the stripes sit evenly across the yellow plate.
For extra practice, have kids layer tissue paper or pom‑poms on the body and thread pipe cleaner antennae through small punched holes—those steps sharpen precision and give a satisfying, textured result.
Cut and glue practice
Cut a 9-inch paper plate down the fold to make matching wings, and you’ll give kids a clear, satisfying way to practice precise scissor control while keeping both halves balanced. I like to pre-draw wing outlines and dotted cutting lines with a washable marker so children follow guides, learn scissor safety, and build confidence. Then we reinforce and decorate.
- Tape or glue a small cardstock tab to the wing base for stronger joins.
- Use 1/2-inch pom-poms, sequins, or paper dots to practice pincer grip.
- Ask kids to glue a set number of stripes or antennae to teach pattern sequencing.
- Compare glued-only joins to taped-reinforced joins to show durability.
I guide steps distinctly, celebrating progress, and we finish together as a proud little crew.
Paper Plate Snowman
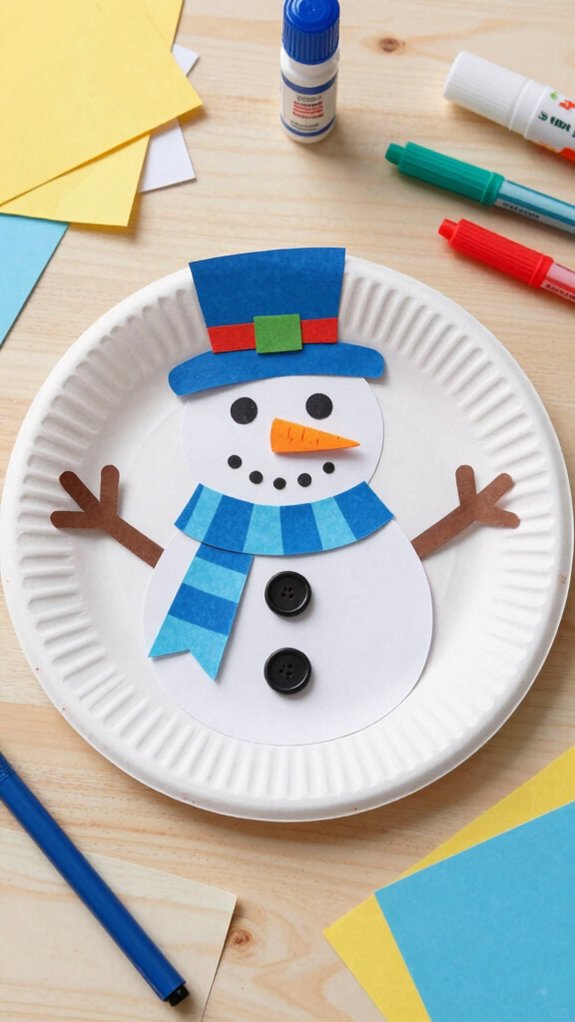
When I make a paper plate snowman, I like to start by thinking about the shape—either two stacked plates for a simple head-and-body look or one plate cut and layered to create three classic snowballs—because that choice decides how you’ll paint, glue, and display it.
I gather white plates or paint, cardstock for hat and carrot nose, googly eyes or black paper, cotton balls, and non-toxic glue.
For assembly, paint and dry, overlap and glue the head to the body, add coal eyes and buttons, then finish with a scarf and twig arms.
This craft encourages fine motor skills and snowman storytelling; try sensory snowballing with cotton for texture.
Variations include masks, cone bodies, or glowing tea-light displays.
Paper Plate Tambourine
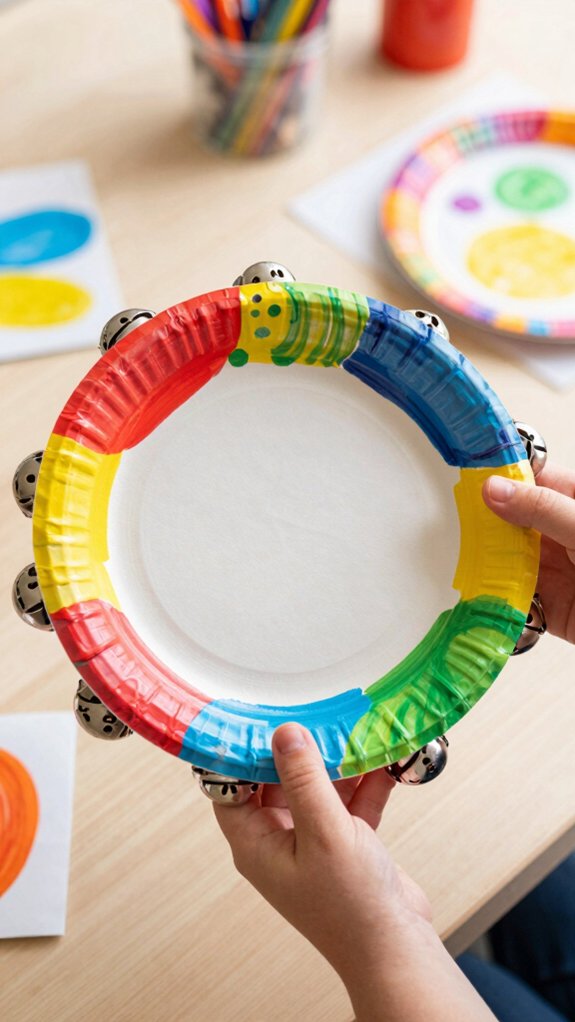
If you liked building a snowman from simple plates, you’ll enjoy turning plates into a musical tambourine next — it’s just as hands-on but adds sound and rhythm to your craft time.
I fold a paper plate in half (or sandwich two), add about 1/4 cup dried beans, then seal the edges; that small amount gives a clear jingle without overfilling.
I use nontoxic glue, reinforce seams with colorful washi tape, and supervise young crafters for safety.
Decorating with washable markers, paint, or stickers makes each tambourine feel like it belongs to someone special.
- Try steady-beat tapping to practice rhythm exploration.
- Play loud/soft contrasts for expressiveness.
- Use listening games to sharpen auditory skills.
- Compare sounds from different fillings.
Pizza Slice Craft
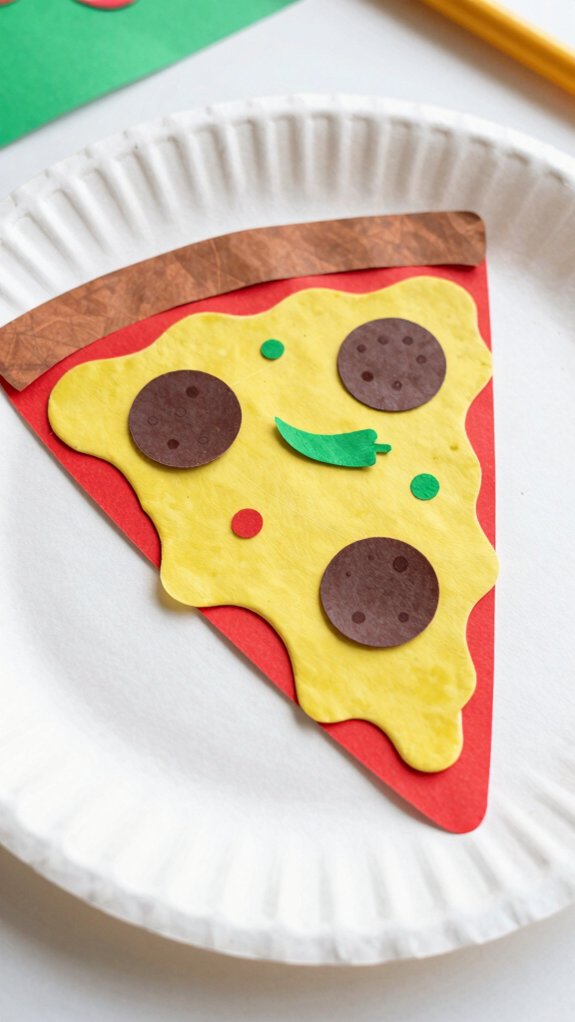
I’m excited to show you how to turn a plain paper plate into a playful pizza slice that’s perfect for pretend play and simple lessons — I start by painting the outer rim light brown for the crust and the center a pale yellow or tan for cheese, then cut the plate into 6 or 8 triangular slices so they look like real pizza pieces.
Next I add toppings from construction paper or felt — red circles for pepperoni, green strips for peppers, black olives — and glue them on for durable, tactile pieces.
For 3D texture I crumple tissue bits for mushrooms or glue pom-poms as meatballs.
I label slices for counting and fraction fun, seal crust edges with washi tape, and we open our roleplay pizzeria.
Paper Plate Butterfly
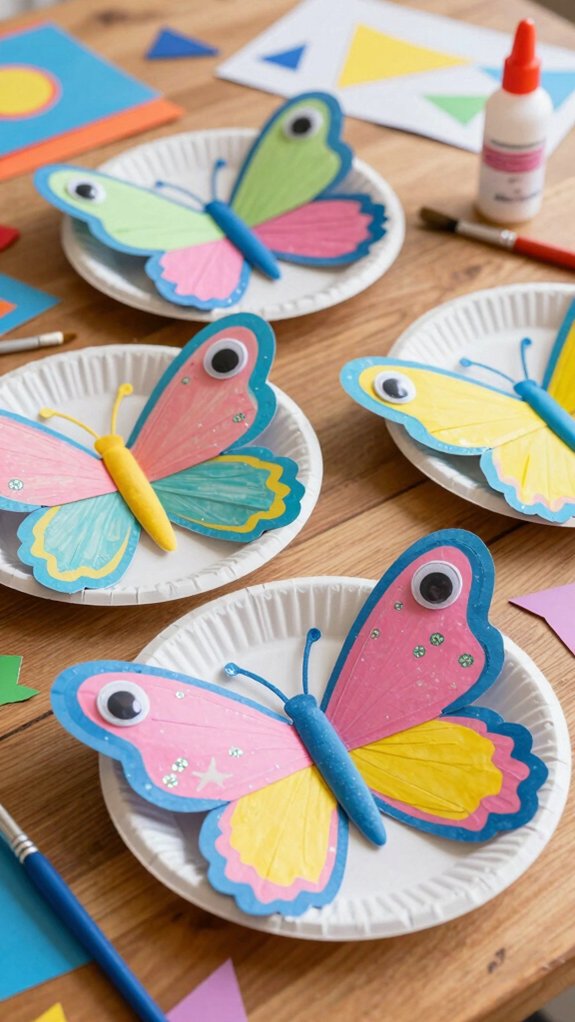
After you’ve had fun slicing and topping your paper plate pizza, let’s turn another plate into a bright paper plate butterfly that’s just as playful and a little more delicate. I love how simple materials—dinner plate, tempera paint, markers, construction paper, glue, clothespin—become something we proudly display. We’ll try color mixing to make rich wing hues and use symmetry exploration by folding wet paint for mirror patterns.
- Cut a plate in half, paint each side, fold halves together for mirrored wings.
- Attach a folded clothespin or paper body; add antennae from construction paper.
- Add glitter, pom-poms, or googly eyes for personality.
- Use a craft stick to make a puppet or hang for classroom decor.
This builds fine motor skills and feels like teamwork.
Weather Wheel Chart
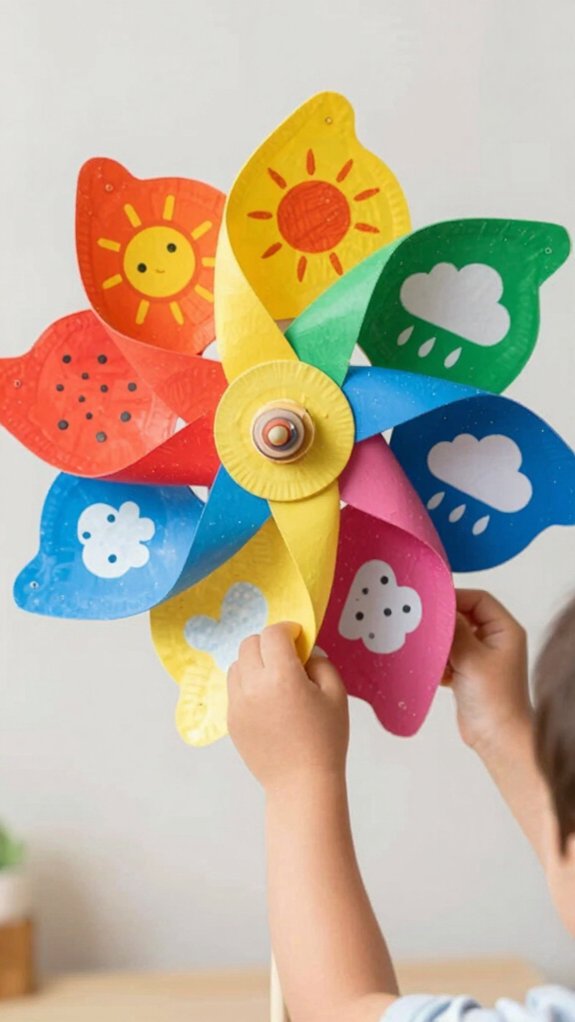
I love turning a paper plate into a weather wheel chart because it’s a hands-on educational activity that gets kids noticing daily changes and practicing vocabulary like sunny, rainy, and snowy.
I’ll show you how to color-code segments, add tactile bits like cotton clouds or glitter sun rays, and attach a cardstock arrow with a brad (reinforce the back with cardboard if it’ll be used every day) so it lasts.
Then we’ll use simple questions and tally the week’s weather to build counting and observation skills, which makes this craft both playful and genuinely instructive.
Educational activity
When you want a hands-on way to teach kids about daily weather and basic data skills, a weather wheel chart is a perfect choice because it’s visual, tactile, and easy to update each morning.
I love making one from a paper plate with a central hole and a spinner attached by a brass fastener. Divide it into 6–8 labeled segments (sunny, cloudy, rainy, snowy, windy, stormy) and add icons or stickers so everyone feels included.
- Use Velcro dots or clothespins for removable symbols to build fine motor control.
- Add cotton-ball clouds, blue cellophane raindrops, and sun cutouts for texture.
- Record daily observations for a week and tally results.
- Compare frequencies to discuss weather patterns and prediction skills.
This creates vocabulary, math practice, and shared exploration.