
You can make 17 lovely paper-sewing projects with cardstock, an awl, needle, and floss—cheap supplies, huge charm! Try botanical cards, embroidered messages, flower doodles, family initials, bookmarks, gift tags, photo-frame accents, and textured wall art. Sketch first, pre-punch holes, then use loose 3–4 mm running or backstitches so paper won’t pucker. Add a clean backing to hide ends. Keep going for the most surprising stitched-paper ideas and finishing tricks!
Key Takeaways
- Create stitched greeting cards, botanical designs, and bookmarks using sturdy watercolor paper, bristol, or cardstock for durable handmade keepsakes.
- Pre-punch evenly spaced holes with an awl, then use running or backstitches to create clean letters, stems, borders, and outlines.
- Turn layered paper scraps, wallpaper samples, and collage shapes into textured wall art with straight seams, grids, or wavy stitched lines.
- Use gentle thread tension and 3–4 mm stitches to prevent puckering while adding deliberate texture to paper surfaces.
- Finish projects with a glued backing sheet to hide thread ends, reinforce thin areas, and give cards, frames, and journals a polished look.
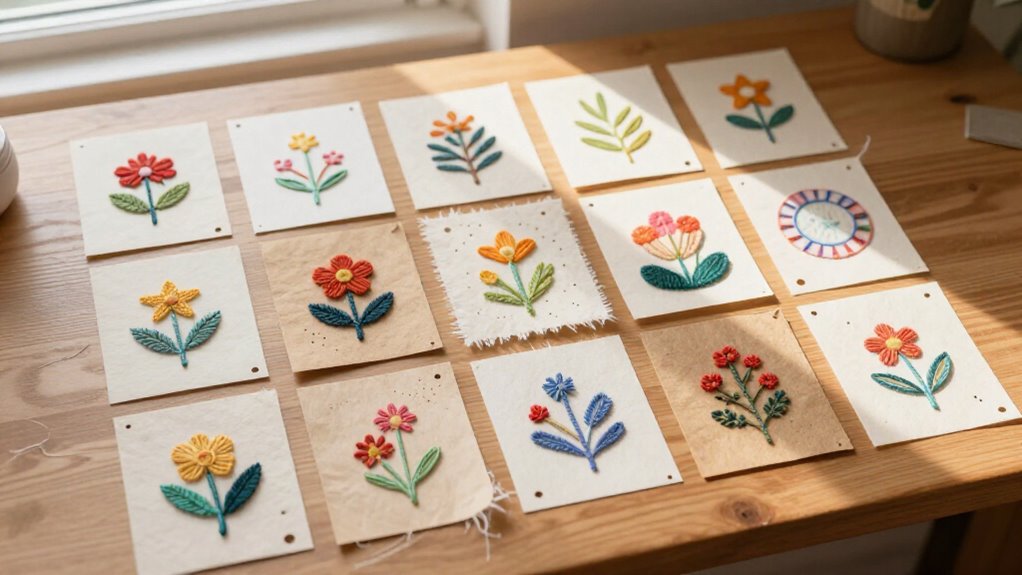
Stitched Botanical Card
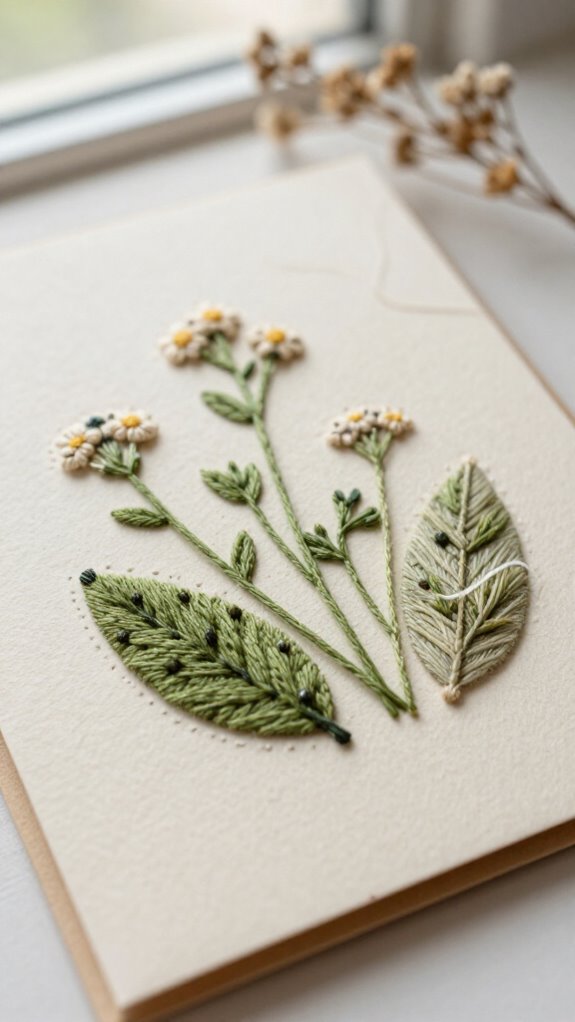
A stitched botanical card turns a simple piece of paper into a tiny garden you can mail—pretty great, right? Choose sturdy watercolor or bristol paper, then sketch leaves, stems, and petals in pencil.
Pierce dotted guides with an awl or brad setter, so your needle won’t wander like it’s lost at a picnic! Use running or backstitches for stems, then satin or blanket stitches for leaves.
Vary greens, browns, and creams for color contrast, creating shadows and bright veins. Stitch just inside your lines for a neat stitched texture.
Knot the thread behind the card, or add a glued backing sheet. Your handmade garden will feel warmly personal.
Embroidered Greeting Card
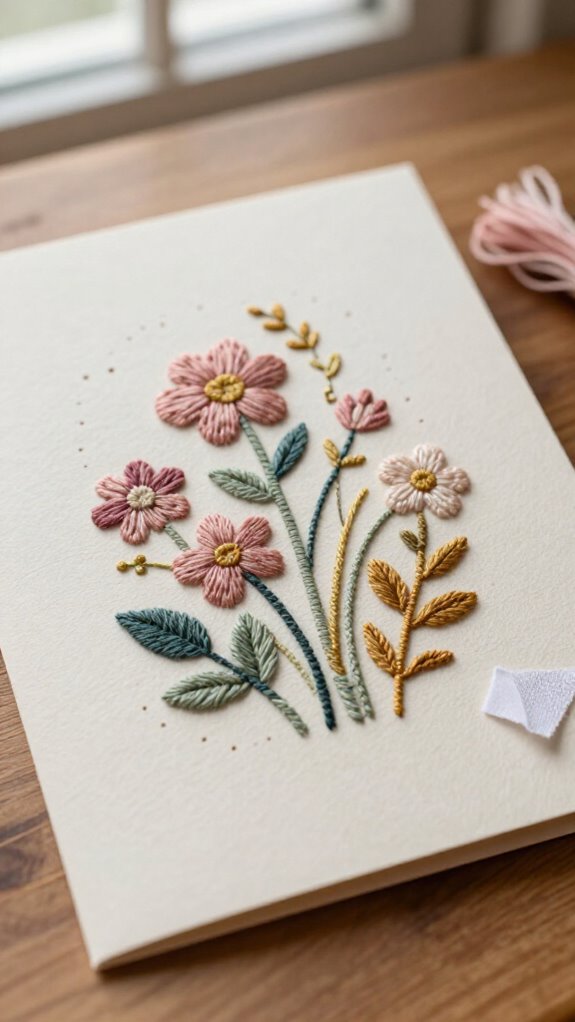
Turn your stitching into a message with an embroidered greeting card—such a sweet surprise to find in the mail!
Choose thick watercolor paper or a manila folder, then test your word size on scrap paper first.
Lightly pencil your design and pre-punch holes with an awl on a mat; paper doesn’t forgive unpicking, sneaky little thing!
Stitch long running or backstitch lines before details, using thread color theory to make your message feel warm and personal.
Keep gentle tension control so the cardstock stays smooth.
Finish with a tiny glue dab or knot behind the thread.
For a polished, store-bought look, glue on a second card layer to hide every stitch.
Sewn Paper Wall Art
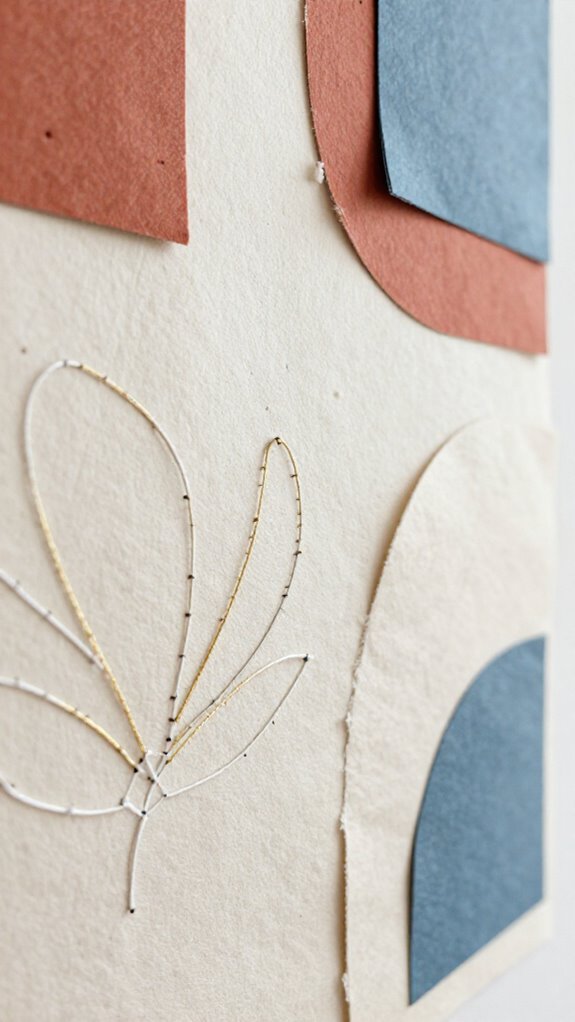
Start with a simple paper collage, then let stitches bring it to life—seriously, a few lines of thread can make flat scraps look like modern wall decor! Choose cardstock or mixed-media paper, glue your shapes down, and hold layers with clips, not pins.
Set your machine to a 3–4mm stitch length, then add a grid, outlines, or wavy paths in colors that fit your design. You’ll create stitched texture layering without needing nonessential supplies—welcome to the club!
Finish with textile inspired borders using zigzag or blanket stitches. Glue a backing sheet over the underside stitches, and your piece looks polished enough to hang proudly.
Thread-Drawn Flower
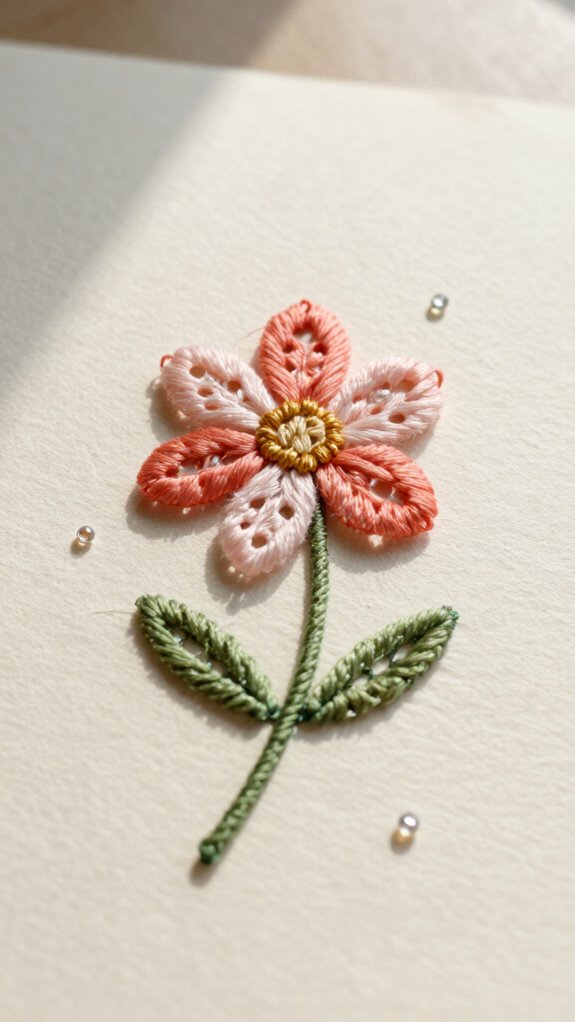
Bring that stitched-paper look into bloom with a thread-drawn flower—an easy little project that turns plain cardstock into bright, textured art!
- Draw petals, then pierce an even stitch path with an awl.
- Use floss and 3–4 mm stitches; these thread tension tips prevent tearing.
- Stitch running lines or satin fills, keeping every petal crisp.
You’ll feel right at home making this cheerful design! Add a smaller, offset petal layer for depth, then secure the back with knotting on paper and trim tails neatly. Finish with tiny backstitches or X’s in the center.
For a surprise flourish, zigzag around the edge—instant garden-frame magic!
Stitched Family Initial
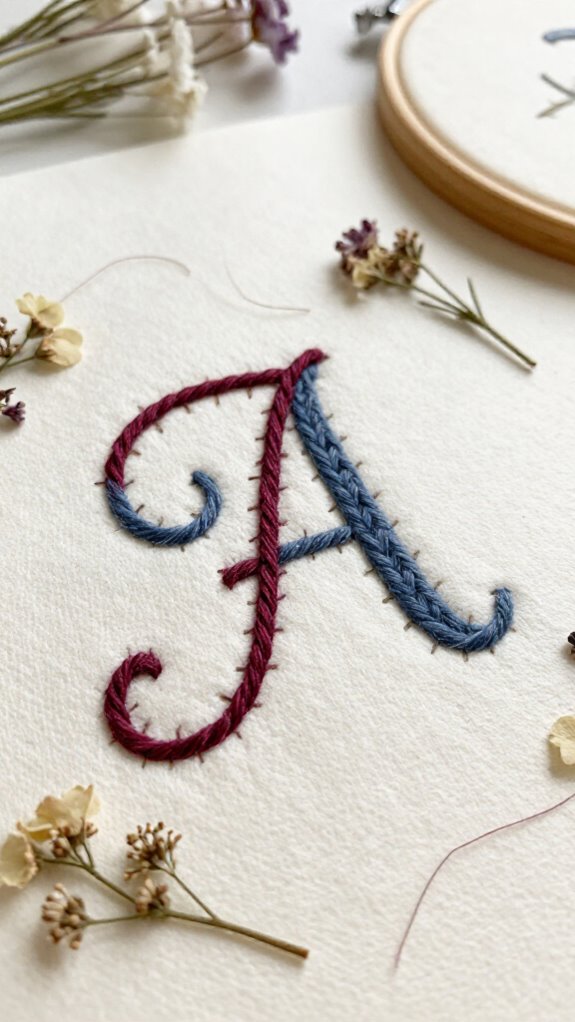
A stitched family initial makes a sweet, personal piece of paper art, and you don’t need elaborate supplies to pull it off—yay!
Choose sturdy cardstock, bristol, or watercolor paper, then lightly pencil your letter.
For Stitch length planning, mark holes about 3–4 mm apart with an awl on a rubber mat.
Use a small-eye hand needle or sharp machine needle, and consider Thread weight choices: lighter thread looks delicate, while thicker floss gives a cozy, bold line.
Try running stitch or backstitch, turning carefully at curves.
Tie a tiny knot behind the paper, or add a dab of glue.
Finish with a backing layer—your family’s little symbol looks polished and proudly displayed!
Paper Quilt Artwork
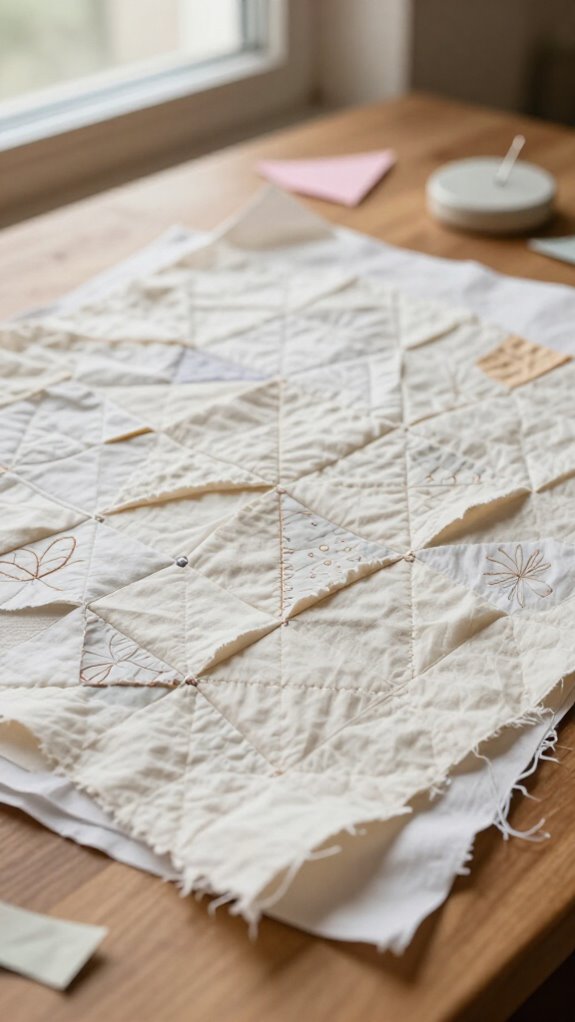
Turn leftover paper scraps into a tiny stitched quilt, and you’ll get colorful texture without needing fabric, batting, or a sewing room—hooray! You’ll feel right at home making this cheerful mini masterpiece.
- Try Quilt block planning on a 3×5 index card first.
- Layer manilla, bristol, or watercolor paper; skip flimsy copy paper.
- Use Thread color mixing, straight lines, and wavy borders for cozy detail.
Glue small pieces onto a backing, then machine-stitch a 3–4 mm grid around each block. Test tension and needles before going bigger—paper can be dramatic!
For the surprise finish, zigzag the edge, then glue a backing sheet underneath to hide stitches.
Embroidered Bookmark Card
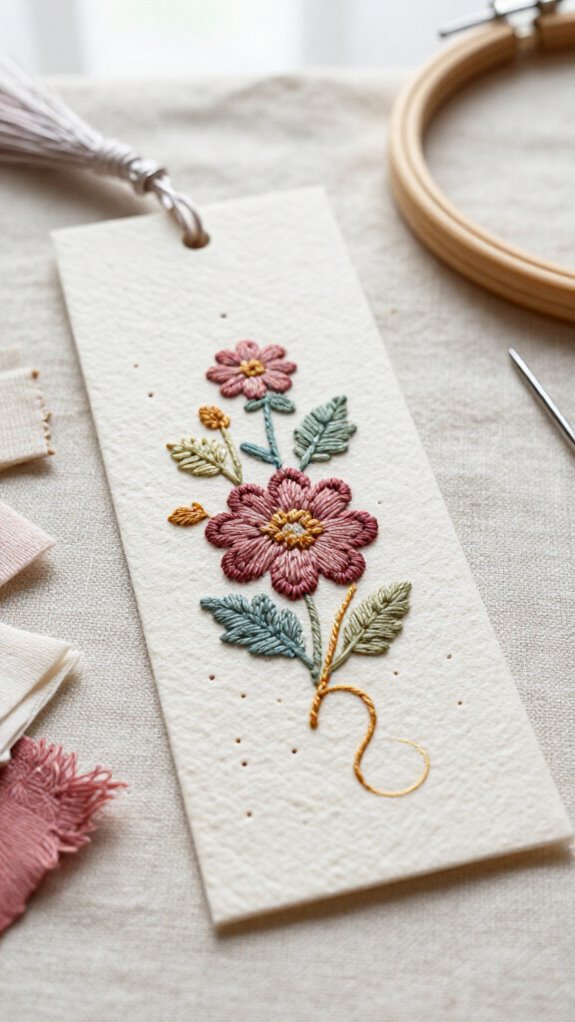
With a sturdy cardstock base, you can stitch a sweet embroidered bookmark card that feels handmade, useful, and way fancier than its tiny supply list suggests—yay! Cut cardstock to about 4.75 by 5.25 inches, then draw letters, flowers, or “BOOKMARK” with pencil stitch templates.
Pierce the guide holes with an awl or brad setter before threading smooth embroidery floss. Follow the lines with running stitch or backstitch, and keep things friendly and relaxed—this isn’t a sewing audition!
Need help? Thread tension troubleshooting is simple: loosen tight stitches so the paper doesn’t pucker. For layered paper or a photo, pierce both layers together.
Knot or glue the thread ends behind the card for a sturdy, gift-ready finish.
Sewn Holiday Ornament
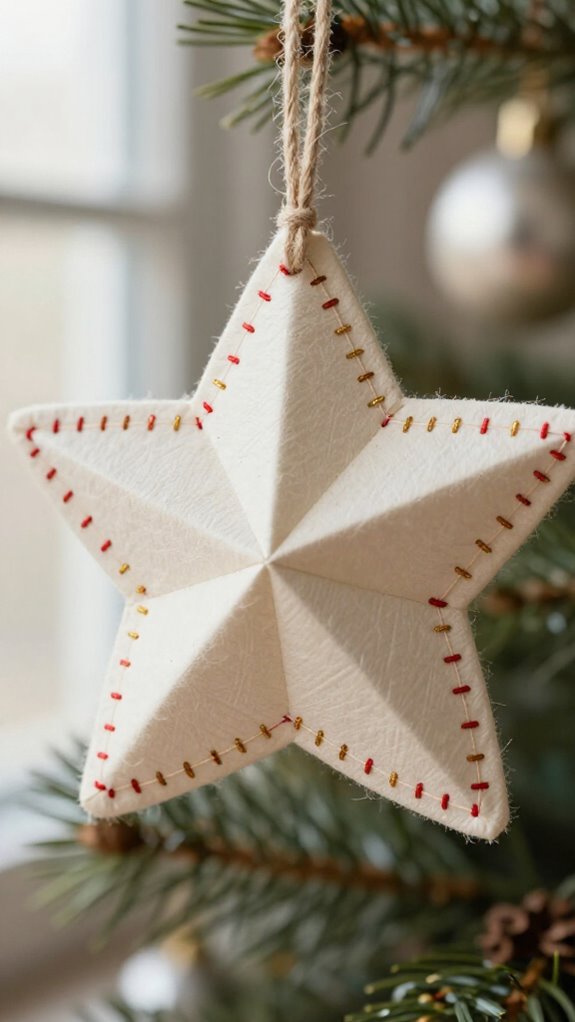
Sewn holiday ornaments turn a small piece of sturdy cardstock, watercolor paper, or bristol into a cheerful little keepsake—no elaborate crafting degree required! You’ll feel right at home making one!
- Sketch a snowflake, heart, or tag lightly in pencil.
- Pre-punch holes on a rubber mat, then use floss and a sharp needle.
- Add Color contrast thread for bright, festive pop!
Try running or blanket stitches around the shape, reinforcing fragile edges as needed.
Avoid thin paper—it tears faster than wrapping paper in December!
Tie off the back with a knot or tiny glue dab.
For a cozy surprise, try paper to fabric layering, then add a ribbon loop.
Your handmade ornament belongs on every shared tree!
Thread Art Birthday Card
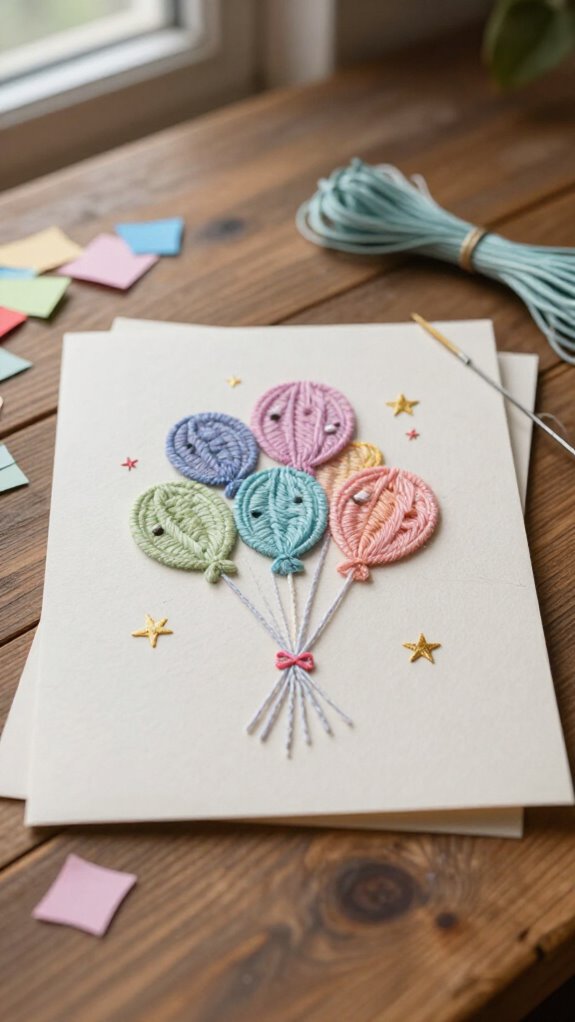
A thread art birthday card adds a bright, handmade surprise to an ordinary envelope, and you don’t need special supplies or expert stitching skills—hooray! Choose sturdy cardstock, then pencil a cake, star, or greeting before piercing permanent holes.
| Try this | Why it works |
|---|---|
| Embroidery floss | Creates bold color contrast |
| Paper clips | Hold layers without pinholes |
Thread your needle and stitch slowly with running or backstitches. Keep thread tension gentle, because paper isn’t a sweater! You’re making something your friend will want to keep.
For a polished finish, knot thread behind the card or add a tiny glue dab. A blanket-stitched border makes your birthday message feel wonderfully special.
Stitched Wedding Invitation Detail
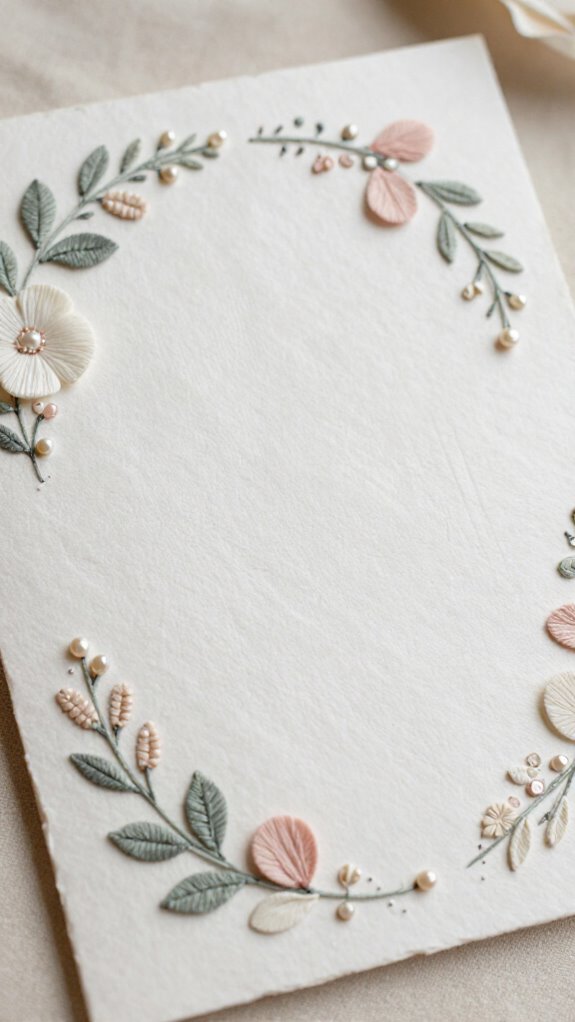
Turn a plain wedding invitation into a keepsake by adding a delicate stitched outline, monogram, or date panel—so pretty!
Plan Stitch placement first, because those tiny holes don’t forgive do-overs.
You’ll create a warm, handmade detail your guests will love.
- Choose cardstock, bristol, or watercolor paper; thin paper can throw a tiny tantrum.
- Pre-punch holes, then stitch slowly with floss, keeping thread tension gentle and even.
- For border finishing, knot or glue ends neatly, then add back panel coverage with a matching sheet.
If you use a machine, choose a 3–4 mm stitch length and pivot carefully at corners.
Your invitation will feel truly yours!
Paper Embroidery Quote
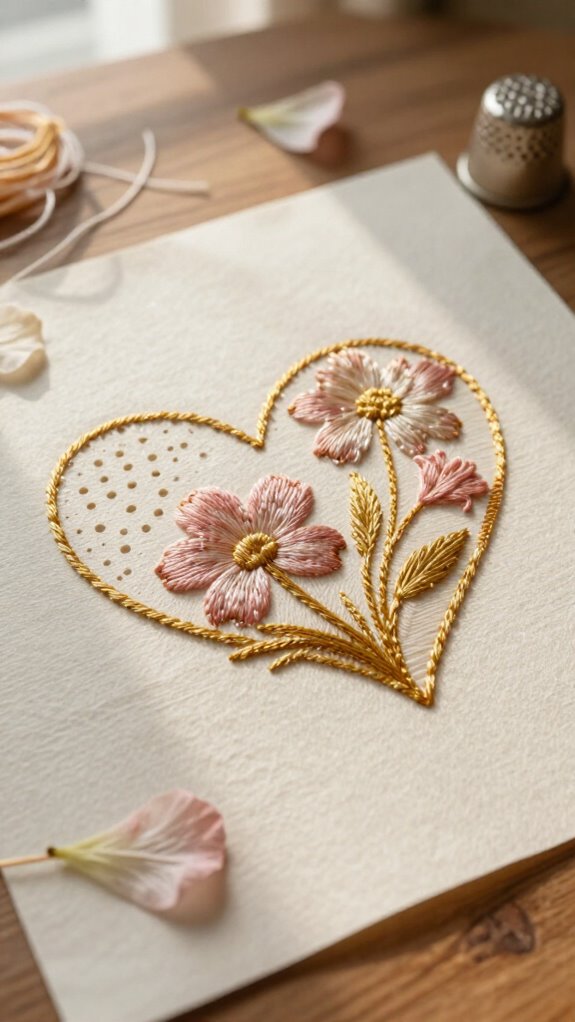
After stitching a sweet detail onto an invitation, let your needle write the message itself! Choose a short quote that makes your people feel seen, then test its size on scrap paper.
Lightly pencil the words onto cardstock, pierce evenly spaced holes with an awl or paper piercer, and stitch with floss and a small needle.
Running stitches look friendly, while backstitches sharpen letters.
Keep steady thread tension control so your paper doesn’t pucker—no grumpy wrinkles allowed!
For thin paper, add muslin or linen paper behind it.
Finish with a knot or tiny glue dab, then cover the back.
That hand sewn texture turns a simple card into a keepsake.
Sewn Travel Journal Cover
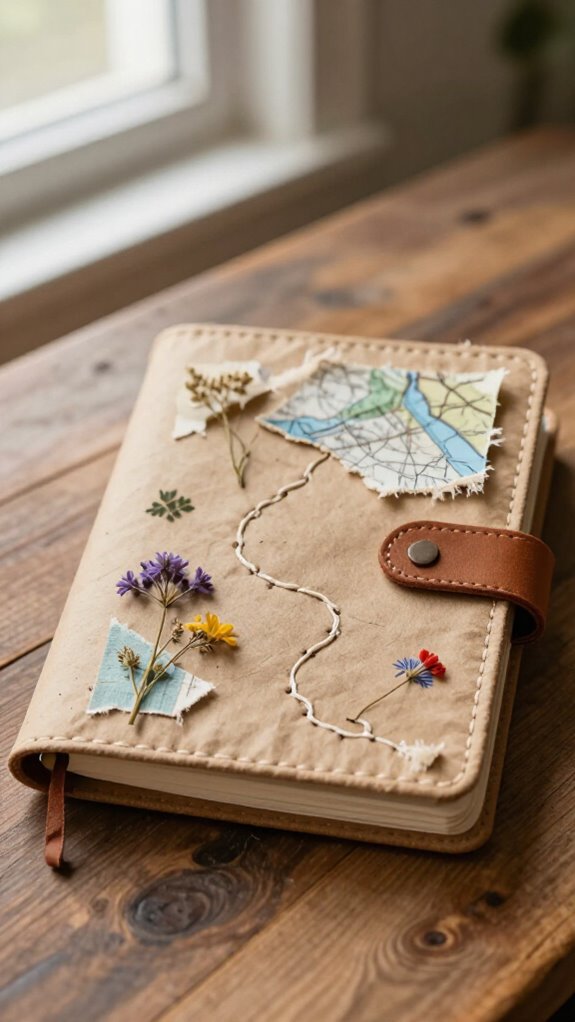
Give your travel journal a cover that looks ready for grand adventures, even if its first trip is just to the coffee shop!
Choose cardstock or watercolor paper, then sketch your route first—paper holes don’t get do-overs!
Clip layers instead of pinning them.
- Stitch a simple border using 3–4mm stitches.
- Add backing to protect thin spots.
- Secure ends with a knot or tiny glue dab.
Sew slowly, lifting the presser foot at corners so everything stays straight.
Want your journal to join the crafty travel club?
Glue on stitched map pockets before sewing, then finish with a zigzag edge.
Add a clear sleeve, and you’ve got a weatherproof cover—rainy-day café approved!
Threaded Birthday Banner
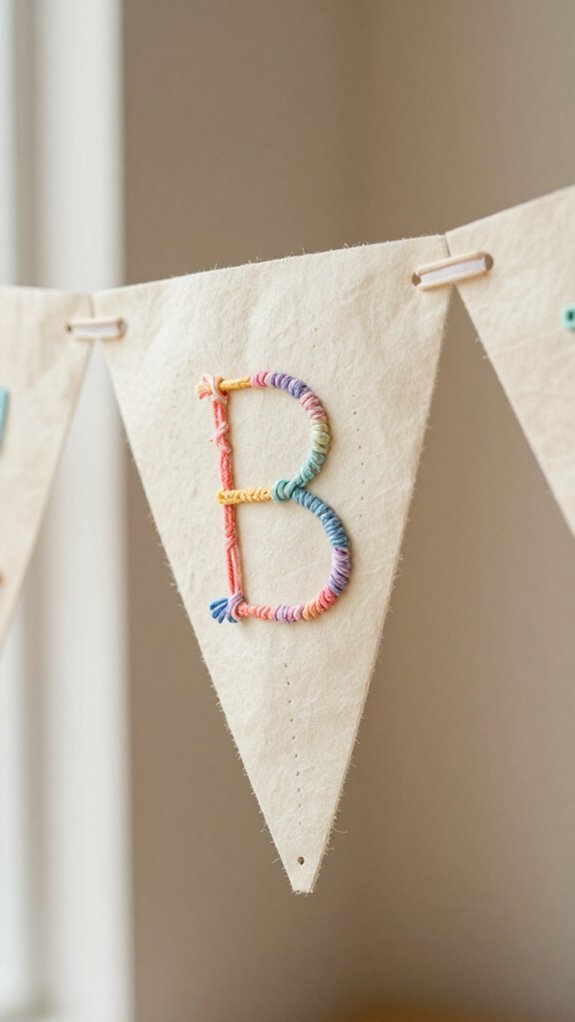
With a few sturdy paper shapes and a bright spool of thread, you can make a birthday banner that feels cheerful, handmade, and far fancier than its simple supplies suggest!
Choose cardstock, bristol, or watercolor paper, then cut triangles, circles, or rectangles.
Mark an even grid before punching holes—these Stitching Spacing Tips keep every letter or shape lined up nicely.
Use a machine for neat straight rows, or add floss doodles by hand for friendly texture.
For Color Thread Pairing, try sunny yellow with blue paper or pink with mint.
String each piece evenly, then back-tie or glue the ends.
Add a zigzag border for a surprisingly polished party finish!
Stitched Floral Gift Tag
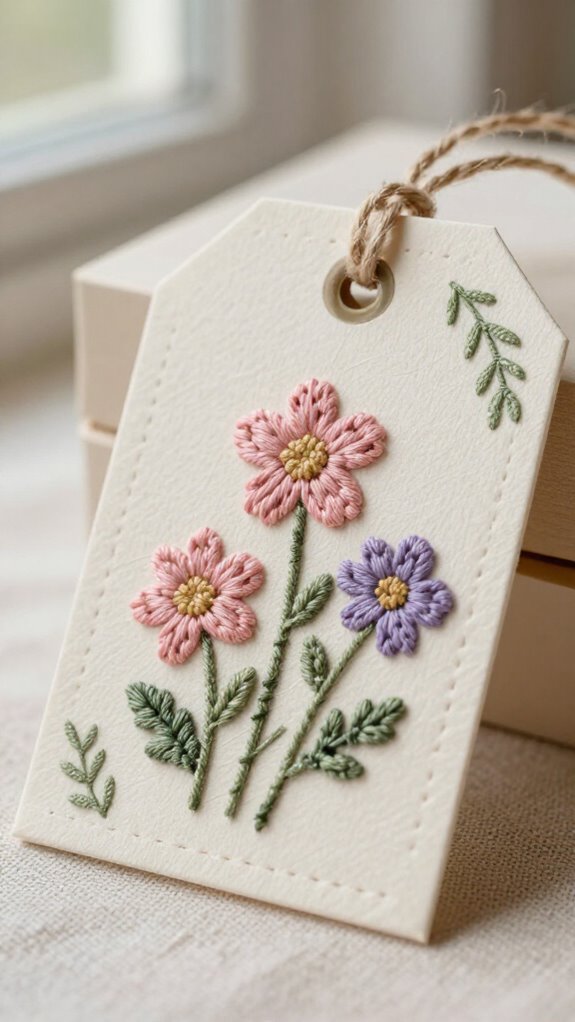
A stitched floral gift tag turns a plain package into a tiny piece of art—seriously, it’s like giving the bow a cute little sidekick! You’ll fit right in with this easy, cheerful make.
- Sturdy cardstock or watercolor paper
- Awl, needle, and bright embroidery floss
- Pencil, glue, and scissors
Lightly sketch a flower, then pre-punch even holes along petals and stems. Your thread weight choice helps keep paper from tearing, so start with floss strands separated. Use running and backstitches, then try satin or blanket stitches for plush petals. Texture pairing makes the bloom feel wonderfully handmade!
Add a wavy leaf vein, knot neatly behind, and glue the end for a polished finish.
Paper and Fabric Collage
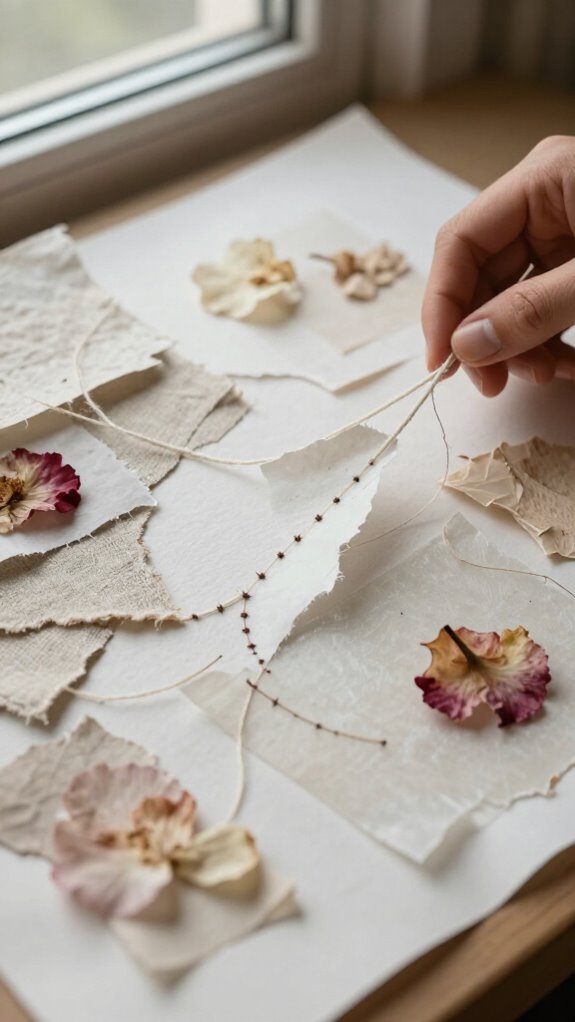
Paper and fabric collage lets you layer soft scraps, torn paper, and colorful thread into a little piece of stitched art—no elaborate supplies or gallery skills required!
| Material | Do this | Result |
|---|---|---|
| Cardstock | Choose heavy paper | Strong base |
| Fabric scraps | Tear small shapes | Cozy texture |
| Thread | Use 3–4 mm stitches | Fewer tears |
| Backing sheet | Glue underneath | Neat finish |
You’ll feel right at home making this! Arrange muslin on mixed-media paper, then slowly stitch outlines, wavy paths, or a thread border. Pre-punch thin layers if needed. Finish with zigzag edges, and vary thread colors like playful pen marks—your collage becomes a tiny framed treasure!
Minimal Line Stitch Art
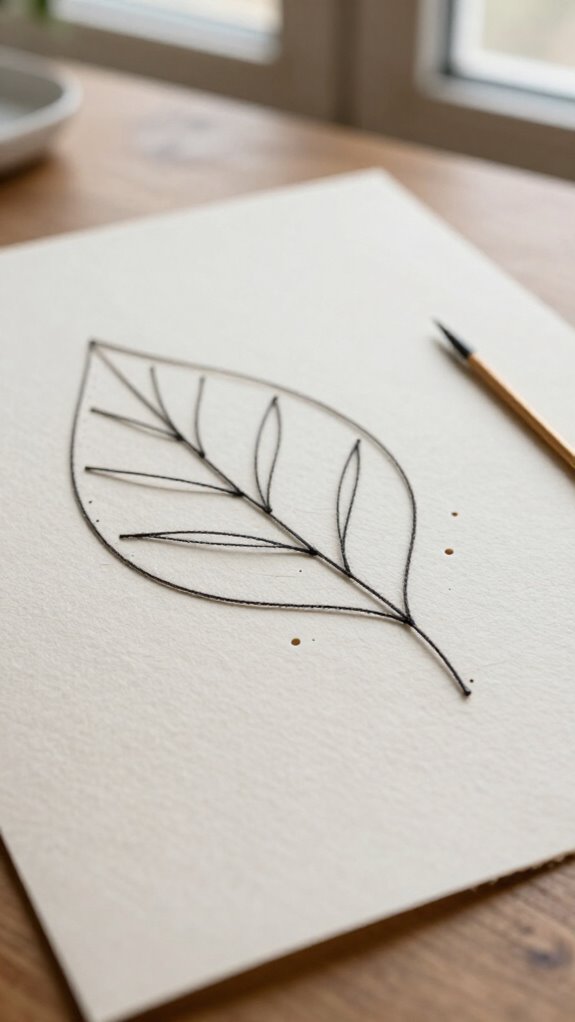
Minimal line stitch art turns thread into a tiny pen, so you can “draw” calm paths, simple shapes, or a few bold parallel marks right on paper—so satisfying!
You’ll fit right in with this easy, low-cost craft. Lightly sketch your route first; hole placement matters because paper doesn’t forgive do-overs!
- Use a needle or awl to pre-punch even holes for hand stitching.
- On a machine, set stitch length to 3–4 mm, go slowly, and don’t force the paper.
- Keep Thread tension gentle, then trim and glue ends neatly on the back.
Try three clean lines in bright thread—the tiny surprise looks wonderfully intentional!
Sewn Photo Frame Accent
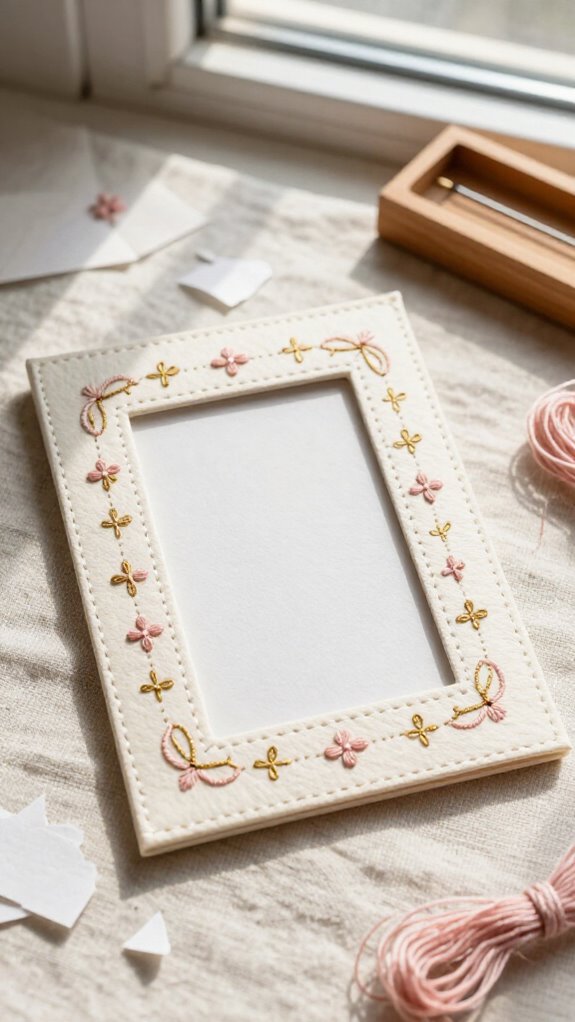
Turn those clean stitched lines into a tiny gallery moment with a sewn photo frame accent! Sketch the frame first, then plan thread placement so every permanent hole lands where you want it. You’ll need paper, thread, a needle or machine, glue, and a favorite photo.
Keep stitch spacing even, about 3–4 mm, and pre-punch holes for smooth, tidy sewing. Stitch the top side of your frame, then glue the photo behind it to hide the back stitches—easy win!
Want extra personality? Add a contrasting floss border with a blanket or zigzag stitch. Suddenly, your snapshot looks like it belongs in your own little art club!
Choosing Paper That Won’t Tear
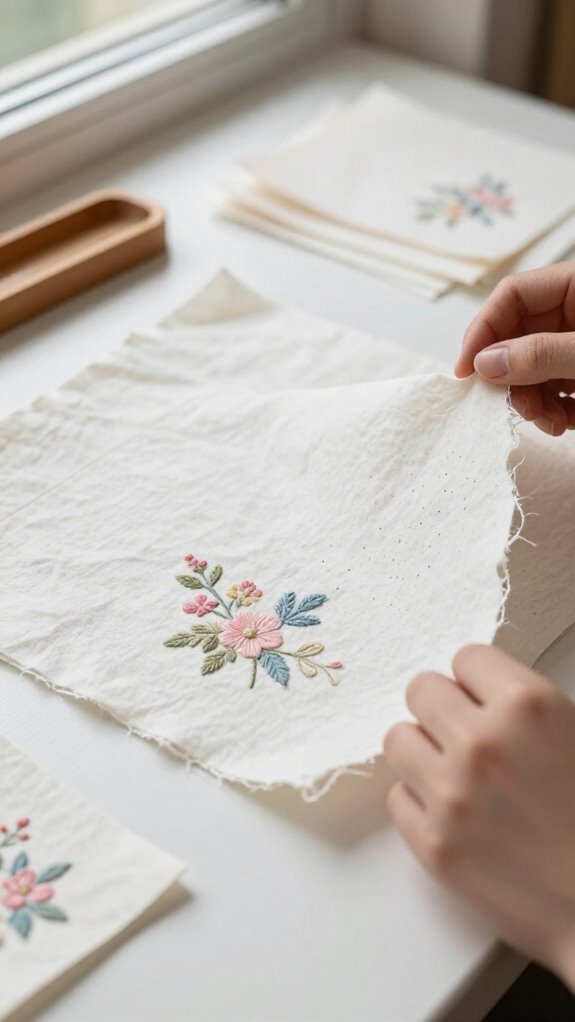
Choose heavy cardstock or watercolor paper when you want clean stitch holes that won’t rip—your needle will thank you!
Handmade paper can work beautifully too, especially if you test a short stitched line first, since its fibers can be a little unpredictable.
Heavy cardstock
Start with paper that has some backbone, since every stitch hole needs enough fiber around it to stay neat instead of tearing into a tiny zipper!
- Choose sturdy cardstock, manila-folder weight, or bristol; skip tissue, book pages, and copy paper.
- Test a scrap first: sew a short line, tug gently, and check thread tension before committing.
- Use a sharp denim needle, practice needle maintenance, and keep a spare nearby—paper dulls needles fast!
If holes start to fan, loosen the crowding by spacing stitches 3–4 mm apart.
You’re part of a clever maker crew, so don’t fear experiments! Avoid cardboard unless you sew slowly with stronger needles; it can bend needles or grumble at your machine.
Watercolor paper
Watercolor paper gives you a lovely, artsy surface for stitched cards, mini wall art, and painted designs—and the right sheet can handle a surprising amount of needlework!
| Choose | Why |
|---|---|
| Mixed-media sheets | Resist stitching stress |
| Bristol weight | Stays firm |
| Sharp needle choice | Pierces cleanly |
| 3–4 mm stitches | Prevents tears |
Follow the Paper grain, keep thread tension gentle, and let the machine feed the sheet—don’t wrestle it like a tiny paper dragon!
Avoid copy paper, tissue, and old book pages; holes widen fast. You’ll get smooth, durable stitches that make your creative crew cheer!
Handmade paper
Handmade paper brings gorgeous texture to stitched projects, but you’ll want a sheet that feels sturdy rather than fluffy and fragile—those loose fibers can turn one neat seam into a tiny tear-fest!
Before joining our paper-stitching crew, test a scrap. Look for firm pulp textures that let your needle puncture cleanly without shredding.
- Choose sturdy handmade sheets, backed with muslin if needed.
- Skip tissue-thin paper; it can rip fast!
- Avoid cardboard-thick stock that may break needles.
For easy paper strengthening, pre-punch holes with an awl, then stitch slowly. You’ll get a textured, handmade look that feels special, polished, and totally worth showing off!
How to Combine Thread and Paper Beautifully
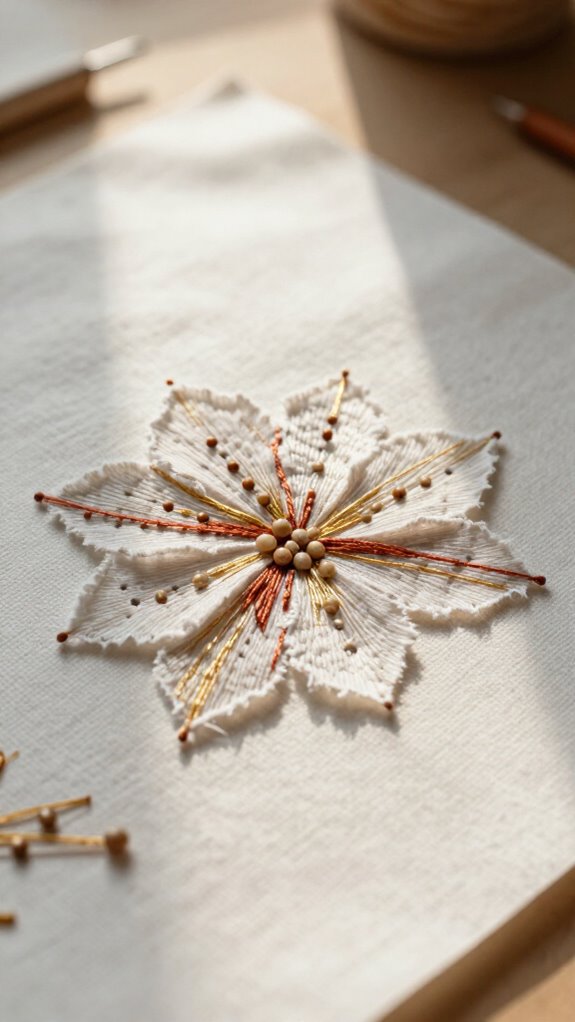
Match your thread to a paper color for a calm look, or choose a bold contrast to make every stitched line pop—so fun!
Layer smooth cardstock with textured paper, then add a small fabric scrap with glue or clips before you sew.
You’ll create a tiny mixed-media masterpiece, and a bright floss edge can be the surprise finish!
Matching thread colors
Thread color can quietly blend into your paper or jump right off the page—both looks are fun! You’re part of the creative crew here, so trust your eye!
- Echo navy on deep blue cardstock for subtle thread texture contrast.
- Use one main color, then save an accent for borders, lettering, or special shapes.
- Test tiny scrap seams under your project’s lighting before committing.
For grids, choose one color for straight structure and another for wavy thoughts. Richer shades shine on thick bristol or watercolor paper.
Here’s the sneaky-good trick: white thread on warm manila makes every stitch glow!
These stitch longevity tips also help your color choices stay clear over time.
Layering paper textures
Start by stacking papers with different personalities—smooth watercolor paper, crisp printer-paper scraps, maybe a bumpy wallpaper sample—and you’ll create a surface that feels as good as it looks! Clip layers in place, then check that the top sheet can handle a needle poke.
Sew straight stitches across seams for structure, using gentle thread tension control for stitching without puckering. If tissue or book pages join the party, back them with cardstock first.
Next, let texture lead: place wallpaper or manilla paper on top and stitch wavy lines or a simple grid. The thread catches every bump—so satisfying!
Finally, glue a clean backing sheet underneath to hide the stitch lines.
Adding fabric accents
A few small fabric scraps can turn a flat paper collage into something wonderfully touchable, and you don’t need special supplies to make it happen!
Try Textile placement over torn paper shapes, then secure scraps with a few stitches. You’re part of a creative crowd that knows tiny details make magic!
- Use 3–4mm straight or wavy stitches like pen marks.
- Adjust stitch density for a bold border or delicate texture.
- Pre-punch holes for thick fabric, then hand-stitch gently.
Go slowly and guide the paper lightly; at corners, lift the presser foot and turn. Here’s the clever finish: glue backing paper behind your work to hide stitches—ta-da, polished art!